I love French Onion Soup. However, over the years, I've never been able to make a really good French Onion Soup because I can't seem to do a good homemade beef broth (I got chicken down pat). I came across this book several years ago at Half Price Bookstore by Bob Bowersox, resident chef at QVC (Shopping Channel). Bob has a lot of experience as a chef having owned several restaurants, which he gave up to take up his post at QVC. The book, In The Kitchen With Bob: My Family's Best, is a compendium of his family's favorite recipes. His Dad's version of French Onion Soup is absolutely wonderful and just uses Swanson's Beef Broth. The secret is the caramelizing of the slow cooked onions. You can use chicken broth in this recipe, but then it's not French Onion, right?
Bowersox Onion Soup
8 medium to large purple onions (I used Vadalia)
4 tablespoons butter
2 10-3/4 ounce cans concentrated beef broth
1-1/2 cans of water
1/2 teaspoon salt
1 teaspoon Worcestershire sauce
1/2 loaf French bread, cut into 2" thick rounds
Mozzarella or Provolone (Dad's choice) cheese, thinly-sliced grated Parmesan cheese
1- Cut the onions into 3/8" slices, then cut the slices in half
2- In a 4-quart stockpot or Dutch oven, saute the onions in the butter. Do this very slowly, over a medium heat until deep, dark brown, with a thickened, almost caramelized texture without being burned. This can take anywhere from 20 minutes to 40 minutes.
3- Add the broth, water, salt and Worcestershire sauce and simmer until hot. Preheat the broiler.
4- Place 1 piece of the French bread in individual ramekins or high-sided, broiler-safe bowls. Ladle the soup over the bread until it is covered and the soup is near the top of the ramekin or bowls. Cover the ramekins or bowls with the cheese, and place under the broiler until the cheese is melted and beginning to brown on top. Serve with the grated cheese to sprinkle over the top. Makes 4-6 servings.
Here is a link to many of his other recipes. He has some of the best sauces I have ever tasted!
http://www.qvc.com/cd/cd_recipes_bowersox_111203.html?tmp=ddsn&cont=recipes
Wednesday, May 30, 2007
Tuesday, May 29, 2007
Update on Blog
I hope you are liking all these new photos! Never occurred to me to take photos while cooking, so I'll try to remember now. I've added links to places I actually buy from. You can save oodles of money buying spices and extracts mail order. I've also added a few recipe sites I like to frequent.
King Arthur Flour - Used this flour as a kid when living in semi-rural Massachusetts. They have recipes and stuff to buy, all to do with baking! Also sell dried whole eggs, which is increasingly hard for the home baker to find.
Penderys - Spice company in Fort Worth for 100+ years. Warehouse in Dallas. This is the place to go for anything chili or hot and most other culinary spices. We've been getting spices from them since 1980 and have always been happy with them. If you want chili powder that isn't hot, I recommend the Fort Worth Lite or New Mexico Lite. Both are good and don't burn me (I hate hot). They often carry blends from the top chili cook off winners, and if you want hot sauce, you will be ecstatic (the names are pretty funny too). I highly recommend!
Penzeys - Also a great spice company with store fronts in several states including the one here in Minneapolis. While they have all the normal cooking spices, they tend to focus on spices for baking, be it casseroles, pot roasts or breads. I love their Old World Blend which is their equivalent of Lawry's Seasoning Salt. No problems with orders, I highly recommend!
Sourdoughs International - First, you have to be into baking bread. Next, you can't have a mother. Mom keeps throwing out my starters. Her argument is that they stink. They also make great bread. Prior to getting these starters, I was a Herman officianodo. Herman is a sweet sourdough that is best after about 2-3 months of fermenting. Lots of recipes for it since it was introduced around 1980. (http://allrecipes.com/Recipe/Herman-Sourdough-Starter/Detail.aspx). Made lots of bread and buns with that for about 3 years before Mom tossed out my starter. Time to advance. I bought the San Francisco, Giza, and Red Sea starters. I don't like the Red Sea one; just too sour. Otherwise, these were great starters and easy to keep going until Mom threw them out. {rolling eyes} I want to try the Russian one next since it works in a bread machine.
Spice Barn - Again, lots of spices, but the extracts are the real seller here for me. No problems with orders, I highly recommend!
Sweet Celebrations (formerly Maid of Scandinavia) - another old, local company under new management. No longer having a storefront, this is mail order only for anything you need for candy making or cake decorating that Wilton doesn't have. I haven't purchased from them since the change of management. I don't do too many cakes anymore.
Taste of Home - many of the recipes I make come from the Taste of Home Magazine. Many are also available at their website, so I've included a link. The recipes always work, but may not be to your family's taste. This is not haute cuisine folks, so don't expect it, but the Midwest now makes more than casserole with cream of something soup, although still popular. You can also buy past annuals from their catalog.
Southern Living - I love Southern cooking. It's not all fried chicken, biscuits and gravy. While I've never been a subscriber, I have all the annuals from the 80s and early 90s and recipes galore. You too can get these. They are cheap on Ebay now. I'm including the link to their site, because they continue to have new recipes that reflect current Southern cuisine; some of it is fusion, some just lower fat or different prep.
Epicurious - I don't care much for gourmet food, as I lack taste buds (loss of smell, no kidding). However, I do watch the show and some of the stuff is fast, easy and cheap to make. Pineapple Foster was just featured on Food TV this week and I'm trying it this weekend! The videos and illustrations make this site worthy of a visit even if you never make a recipe from here.
Cooks Illustrated - I was a charter member when this magazine came out. Wonderful illustrations and step-by step how tos. Lots of history of how things were developed or why you do this a certain way. The recipes sucked. They had too many errors. These were not inexpensive ingredients and after throwing out a third meal uneaten, I tossed my mags when they arrived. Sometime later, they must have added an extra editor to double check the recipes because I don't hear the complaints that once existed. I love the videos and explanations on this site, but many of the recipes cannot be directly accessed without getting a subscription. A pain, but there you go.
Land O Lakes - Large regional dairy. Some very yummy recipes here.
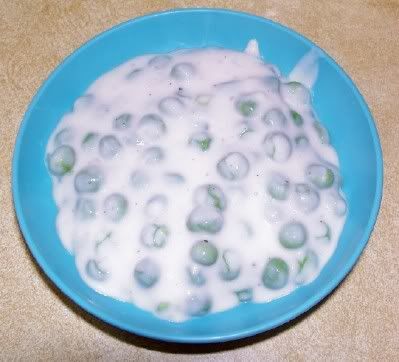
Creamed Peas on Toast
When I learned how to cook (12 or 13 before I could use a stove), our afternoon snack after getting home from school was frequently creamed peas. It was easy to make. Tasted great. It's pretty darn good on potatoes too. There are many variations out there, but this is the basic. I tend to add a good deal more pepper. It's just your basic thick white sauce with peas. Traditionally, you are supposed to serve this on toast, but we don't actually do that too often. It is my understanding that this recipe originally came from Sweden or Germany. That would account for it being as popular in Texas (lots of Germans) as in Minnesota while it was virtually unheard of in Massachusetts.
2 tablespoons butter or margarine
2 tablespoon flour
1 cup milk
1/2 teaspoon salt
1/8 teaspoon pepper, or to taste
2 cups of cooked peas (frozen, canned or fresh cooked)
Melt margarine in saucepan on low heat. Add flour, salt and pepper and mix. Cook for about a minute, stirring occasionally. While stirring, slowly add a little milk and keep stirring to prevent lumps. Pour all the milk in, stirring well. Cook until it starts to thicken. Add the peas. Cook until peas are heated through. Serve by itself, on potatoes or over toast.
White sauce takes a little practice to get it right without the lumps. Lumpy creamed peas is just fine, but then pour over potatoes or rice to hide the lumps. Variations will have more butter or more flour, which is just fine.
The variations I think are most interesting include adding garlic, shallots or green onions, and sour cream. The problem with the garlic or onions is that you have to cook them first, which adds time to your prep. Regular cream just makes this dish too heavy. Adding a 1/2 teaspoon of mustard may be a good twist. A little cardamom would also be in keeping with the Swedish tradition, as it is one of the most common spices in that cuisine (The Finns use it soley in baked goods). Some folks add a little bit of sugar; I think it is unnecessary, but perhaps if your peas aren't so good, it helps. In any case, enjoy!
2 tablespoons butter or margarine
2 tablespoon flour
1 cup milk
1/2 teaspoon salt
1/8 teaspoon pepper, or to taste
2 cups of cooked peas (frozen, canned or fresh cooked)
Melt margarine in saucepan on low heat. Add flour, salt and pepper and mix. Cook for about a minute, stirring occasionally. While stirring, slowly add a little milk and keep stirring to prevent lumps. Pour all the milk in, stirring well. Cook until it starts to thicken. Add the peas. Cook until peas are heated through. Serve by itself, on potatoes or over toast.
White sauce takes a little practice to get it right without the lumps. Lumpy creamed peas is just fine, but then pour over potatoes or rice to hide the lumps. Variations will have more butter or more flour, which is just fine.
Saturday, May 26, 2007
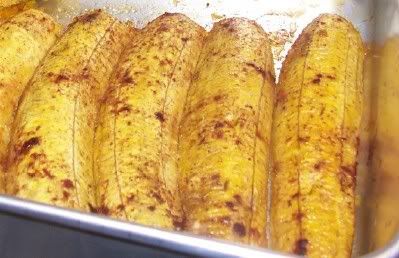
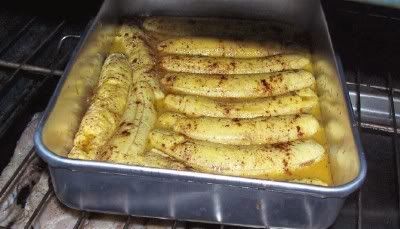
Baked Ripe Plantains
What do you do if you don't have time to make your Platanos and your plantains are now yellow? You can bake them. The advantage to this recipe is that you can make ahead and reheat in the microwave. Keep covered to maintain moisture.
Baked Ripe Plantains
Start with very ripe plantains. Jacket will be yellow like a regular banana you slice into your Cheerios. Slice lengthwise and peel. Slice in half lengthwise. Place in buttered pan, flat side down, lining the bottom of the pan with plantains. With a brush, paint over with a little butter. Sprinkle with cinnamon and nutmeg, brown sugar and 1/2 cup orange juice. Cover pan and bake at 350 F for about 30 minutes. Remove cover and bake for another 20 minutes. Place on plate to serve by itself or add stuff like Cool Whip or ice cream.
This snack tastes rather like a baked sweet potato. If you have a much younger crowd, you may want to add more brown sugar.
Here they are in the oven baking. We used an aluminum cake pan.
Plantain Update
My Aunt came over today and showed us how she now makes Platanos and what to do when your plantains are too ripe for the treat. As she was cooking, it dawned on me that I could give you action photos!! Note, this is the color you want your Plantains: Green!

Platanos
Several green plantains (each one makes 4-5 snacks)
Oil (vegetable, peanut oil)
3 quart saucepan (deep to prevent spills)
Serated spoon
2 tablespoons Salt
1/2 teaspoon Garlic powder
1 cup of water
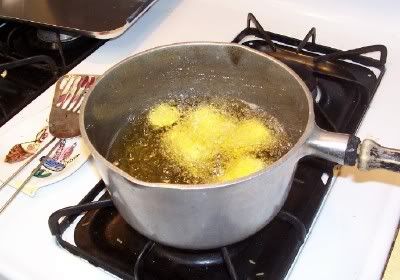
Put about 4-5 inches of oil in saucepan and heat oil to a gentle boil. Place salt and garlic into a small bowl and add about a cup of water. Mix well. Slice the banana jacket lengthwise and peel off. Slice plantains about 1 1/2 inches thick. Place into oil using serrated spoon. Occasionally turning, cook until light brown (5-7 minutes). Remove cooked slices to paper towels to drain for a minute. Smoosh flat in hamburger press (or with flat bottomed bottle). Place each piece into the bowl of water, turn over, then remove and place on a paper toweled plate to rest for about 3 minutes. Turn the heat up on the skillet so that the oil is boiling harder. Place the pieces into the oil and fry until slighty darker brown and crisp, about 2-3 minutes. Remove and place on towels to drain. Eat while hot.
Here's the first fry. The goal here is to soften the fruit, so keep the heat down! I have to take this opportunity to point out the 1930s cookware in use. Originally we got a couple of these saucepans from my grandmother when she passed away, but occasionally, they show up at Salvation Army or Ebay. I have a whole set. Also, the spoon rest was on my grandmother's stove and in continual use since the 1950s.
Here's what they look like after flattening and dipping in salt water.

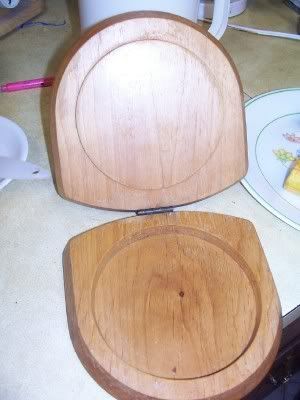
Here's what we used to flatten our snacks. An ordinary hamburger press. You can still find these some places, but I mostly see them at garage sales. This particular one is at least 30 years old. Use a large sheet of waxed paper to protect the wood and reduce your cleaning.
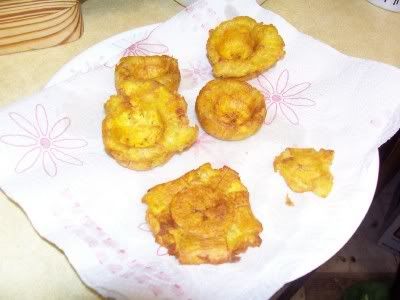
Here's a comparison of first fry vs. completed. These are cut about 2 inches thick for the cup press.
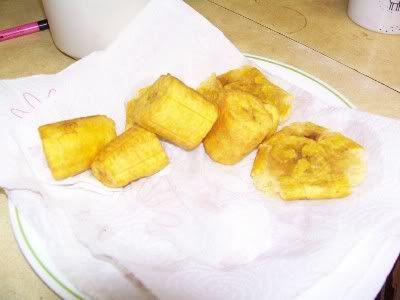
These ones use a 'cup' press for canapes. Fill with whatever you like.
Platanos
Several green plantains (each one makes 4-5 snacks)
Oil (vegetable, peanut oil)
3 quart saucepan (deep to prevent spills)
Serated spoon
2 tablespoons Salt
1/2 teaspoon Garlic powder
1 cup of water
Put about 4-5 inches of oil in saucepan and heat oil to a gentle boil. Place salt and garlic into a small bowl and add about a cup of water. Mix well. Slice the banana jacket lengthwise and peel off. Slice plantains about 1 1/2 inches thick. Place into oil using serrated spoon. Occasionally turning, cook until light brown (5-7 minutes). Remove cooked slices to paper towels to drain for a minute. Smoosh flat in hamburger press (or with flat bottomed bottle). Place each piece into the bowl of water, turn over, then remove and place on a paper toweled plate to rest for about 3 minutes. Turn the heat up on the skillet so that the oil is boiling harder. Place the pieces into the oil and fry until slighty darker brown and crisp, about 2-3 minutes. Remove and place on towels to drain. Eat while hot.
Here's the first fry. The goal here is to soften the fruit, so keep the heat down! I have to take this opportunity to point out the 1930s cookware in use. Originally we got a couple of these saucepans from my grandmother when she passed away, but occasionally, they show up at Salvation Army or Ebay. I have a whole set. Also, the spoon rest was on my grandmother's stove and in continual use since the 1950s.
Here's what they look like after flattening and dipping in salt water.
Here's what we used to flatten our snacks. An ordinary hamburger press. You can still find these some places, but I mostly see them at garage sales. This particular one is at least 30 years old. Use a large sheet of waxed paper to protect the wood and reduce your cleaning.
Here's a comparison of first fry vs. completed. These are cut about 2 inches thick for the cup press.
These ones use a 'cup' press for canapes. Fill with whatever you like.
Friday, May 25, 2007
Homemade Yogurt
On one of my discussion boards, someone was talking about going on the Fruit and Yogurt Diet. Then, there are 12 posts saying how unhealthy it is. It isn't. It is commonly what is used, with some additions, for someone with their jaw wired shut. One thing you do need though is yogurt. Lots of it. It is SO easy to make yourself that the only problem is having the room in the fridge to keep it cool once it is done. I prefer vanilla yogurt (plain, no fruit). But I also adore smoothies with a variety of fruits and flavors!
Making Homemade Yogurt by the Gallon
Equipment:
Thermometer
8 quart stainless steel stock pot (thin wall is better)
Heating pad
1 gallon whole milk
Either yogurt starter or small container of any yogurt at grocery store.
Cutting Board
Pour the gallon of milk into the stock pot. Heat gently, stirring occasionally, until temperature reaches 120 F. Turn it off. Let it cool until temperature is between 108 to 112 F. Add the container of yogurt (you can take a little out for a snack). Stir well. Place a cutting board on counter. This will protect your counter from heat damage. Place heating pad on top. Place stock pot on top of that. Turn on low and cover. Monitor. Is it maintaining the temperature between 108 and 112? If not, turn to medium. Cover and leave overnight. It needs a good 12-18 hours of incubating. Once done, you have yogurt. Not the firm stuff you have at the store (they use stabilizers), but absolutely perfect for smoothies! Sweeten to taste using whatever you want. If you would like something firmer, put several layers of cheesecloth into a colander set into a bowl. Add as much yogurt as will fit. Let it sit for a few hours to drain. It does not have to be refrigerated during this process.
You can save out 1 cup amounts of yogurt and freeze it flat in a 1 quart Ziploc to make later batches. Unthaw the yogurt prior to heating your milk.
The reason why you heat the milk and then cool it is to kill off any bacteria that may compete with the yogurt culture. You don't need a double boiler. Just keep the heat low. Occasionally, you'll get a little milk burn in the center, but it doesn't affect flavor. If you just can't get your heat down far enough (my sister who has propane can't), then place a trivet on the bottom of a wider pan, add several inches of water and you have a double boiler. The advantage of using a thin walled stock pot is that the heat from the heating pad gets right through. I have not tried it with a Caphalon stock pot--the thickness may require the medium heat on your heating pad. You can use 2% or skim, but frankly, I didn't like the flavor or texture as much.
Oh, and if you are interested in doing a Fruit and Yogurt diet, make sure you use WHOLE MILK to have enough fat to prevent a blood sugar spike and add raw or pasteurized egg to your smoothie to increase the protein. I would also add a veggie salad: crisp veggies with salt and pepper, no dressing.
Now, Alton Brown (Good Eats) uses a slightly higher incubation temperature. Not sure what the advantage is, but I'm giving you the link because his Thousand Island Dressing using yogurt is pretty good too. He uses 2%.
http://www.foodnetwork.com/food/recipes/recipe/0,1977,FOOD_9936_19495,00.html
If you want to know about the history of yogurt and some of it's uses, here's a great link.
http://en.wikipedia.org/wiki/Yogurt
Monday, May 21, 2007
Cutty Sark and SOS
Today's recipe is in honor of the Cutty Sark, which suffered a serious fire overnight. My late grandfather served on a Merchant Marine vessel (torpedoed by the Nazis) and he said the food was the same as in the US Navy. This is a love it or hate it recipe given to me by a retired naval cook. My Dad still loves this stuff and he's been out of the navy since the 50s. It also is very useful on camping trips. Usually referred to as SOS when around women or children, nonetheless, pretty much any guy who has been in the military knows about it and either loves it or detests it. Easy, easy to make, although nowadays, I use Carl Buddig deli beef or corned beef instead of dried beef (lower in salt, easier to chew, cheaper). If you do that, you can alter the first step as you don't have to hydrate the beef. I've noted here on the Internet that some folks have substituted cooked hamburger for the chipped beef. It's probably just fine, but it's not SOS. Final note: dried beef is typically found in the vicinity of Spam which is another love it or hate it food popular in the armed forces. I happen to love it.
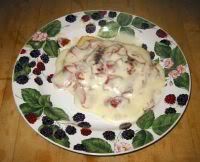
Photo from Wikipedia
Shit On A Shingle (or Chipped Beef on Toast)
4.5 oz. dried beef
2 cups milk
2 tbs. butter
¼ cup flour
Salt and pepper
6 slices bread
Melt butter in pan, add dried beef. Cook 2-3 minutes to brown. Add milk (reserve ¼ cup for later), salt & pepper. Bring to boil. Mix flour and remaining milk together. Slowly add to boiling mixture until it begins to thicken. Serve over toast.
Now, the above is the home version. The one at Wikipedia is much closer to what this retired navy cook actually made.
http://en.wikibooks.org/wiki/Cookbook:Chipped_beef_on_toast
Sunday, May 20, 2007
Hawaiian Baked Chicken
As you are probably aware, the only thing Hawaiian about most Hawaiian recipes is the pineapple. This one is no different, but it was tasty. I love pineapple with chicken, so am willing to try anything that has it.
This recipe comes from my recently purchased Taste of Home Cookbook. It's a 3 ring bound cookbook designed to be a general cookbook for any home. I love my original Betty Crocker Picture Cookbook, but badly need updated recipes and cooking information. If you need a starter cookbook for the non-gourmet, this is a good one to get. If your giftee is into gourmet food, then I would recommend the latest copy of Joy of Cooking.
I liked this simple recipe, but contrary to what I normally do, I changed it first time out. I added a lot more paprika than the recipe called for and I'm glad I did. Note the temperature. I had everything ready to pop into the oven when I realized the 400 degree temp. Since I wasn't sure whether my baking dish could be in heat that high, I baked at 350 for a longer time. I had a lot of liquid, but that could have been due to the lower temp. I also substituted with canned chunk pineapple, which was all I had. Tidbits would have been a better substitute for crushed. I forgot the butter, but it still tasted fine (loses body). Since I don't like wine in my food, I used the chicken broth. This recipe would also work fine in the microwave or roaster, so if it's too hot, you have alternatives.
Hawaiian Baked Chicken
Leona Callen, Anna Maria, FL
12 boneless skinless chicken thighs (4 oz. ea)
2 cans (8 oz ea) unsweetened crushed pineapple, undrained
1/4 cup sherry or chicken broth
1/4 cup spicy brown mustard
1/4 cup honey
2 tablespoons butter, melted
1/2 teaspoon paprika
1. Arrange chicken in a shallow baking dish coated with nonstick cooking spray. In a small bowl, combine the pineapple, sherry or broth, mustard, honey and butter; mix well.
2. Spoon over chicken; sprinkle with paprika. Bake uncovered, at 400 F for 35-45 minutes or until a meat thermometer reads 180 F.
Wednesday, May 16, 2007
Coconut Bread
We went from 80 F yesterday to expecting frost tonight. Totally weird, but baking season resurfaces here during these opportunities. Tried this bread. Tasty, tasty. By the way, did you know that Quick Breads are an American invention? Yeah, imagine that?!
Coconut Bread
from Taste of Home Book of Baking (Virginia Doyle, Pinedale, WY).
2 cups sugar
3/4 cup vegetable oil
4 eggs
2 teaspoons coconut extract
3 cups all-purpose flour
1 teaspoon baking powder
1/2 teaspoon baking soda
1/2 teaspoon salt
1 cup buttermilk
1 cup flaked coconut
1 cup chopped walnuts
In a large mixing bowl, combine the sugar, oil, eggs and extract. Combine the flour, baking powder, baking soda and salt; add to sugar mixture alternately with buttermilk, stirring just until moistened. Fold in coconut and walnuts.
Pour into two greased 8x4x2 inch loaf pans. Bake at 325 F for 60-65 minutes or until a toothpick inserted near the center comes out clean. Cool for 10 minutes before removing from pans to wire racks to cool completely. Yield : 2 loaves.
Mixed Bean Casserole
I've tried several versions of this casserole and they all are good. This one is pretty easy to get made up and ready and works perfect for a family picnic or barbecue. It is also not too sweet and non-cook friendly as well. If you can saute an onion without burning it, you are good to go. The only thing I do differently is I add the bacon to the casserole.
Mixed Bean Casserole
from Lone Star Legacy
1 clove garlic, minced
1 medium onion, chopped
3 tablespoons bacon drippings
1 can (15 oz.) baked beans
1 can (15 oz) kidney beans
1 can (15 oz) lima beans
1/2 cup catsup
3 tablespoons vinegar
1 tablespoon brown sugar
1 teaspoon dry mustard
1 teaspoon salt
1/4 teaspoon pepper
Cook garlic and onions in bacon drippings until onion is limp. Place all ingredients into a 2 quart casserole and mix. Bake at 350 F for 45 minutes. Serves 6. If it's hot out, this works fine in a slow cooker as well.
Sunday, May 13, 2007
Mandarin Pork
This was amazingly yummy. Mom used a 3 lb. pork roast and baked this at 325 F instead of grilling and it was wonderful!!! Just bake until meat thermometer says it's done (hour and a half, two hours depending on size). From the cookbook Country Pork (Taste of Home books). Served with fried rice and a salad, this was awfully yummy.
Mandarin Pork
(Flo Weiss, Seaside, OR)
1 cup soy sauce
1/2 cup vegetable oil
3 tablespoons honey
1 tablespoon ground ginger
1 tablespoon ground mustard
1 garlic clove, minced
2 pork tenderloins (3/4 to 1 pound each)
Sweet and Sour Sauce
1/2 cup orange marmalade
2 tablespoons vinegar
1 tablespoon diced pimentos
1/8 teaspoon paprika
dash salt
Fire Hot Mustard
1/4 cup boiling water
1/4 cup ground mustard
1/2 teaspoon salt
Combine the first six ingredients in a large resealable plastic bag or shallow glass container; add pork and turn to coat. Seal bag or cover container; refrigerate overnight, turning meat several times. Meanwhile, combine sauce ingredients in a bowl; cover and chill. In another bowl, stir boiling water into mustard; add salt and stir until smooth. Cover and let stand at room temperature for 1 hour; chill. Drain meat and discard marinade. Grill, covered, over medium coals, turning occasionally, for 18-20 minutes or until a meat thermometer reads 160 - 170 F. Let stand for 5 minutes before slicing. Serve with sauce and mustard for dipping. Yield 6-8 servings.
Saturday, May 12, 2007
Plantanos
Probably the last time any of you have thought of Panama is back when David Lee Roth was still with Van Halen. Today, I have a quick and easy recipe for you. My Aunt comes from Panama and taught me years ago how to make very yummy Plantanos. Plantains are a large banana that must be cooked; they've been appearing in mainstream grocery stores for around 10 years. It's very starchy and just is nothing like a regular dessert banana. These may be a tad fattening, but they are totally addictive. Wear an apron--you don't want to accidentally get oil on your clothing.
Plantanos
Several plantains
oil - enough for a level of about 3 inch inches.
salt
Heat oil in a wide frypan, electric frypan or in your electric frycooker. Peel plantains and slice about 1 1/2 inches thick. Fry in hot oil until light browned, then flip and fry the other side. Lift out with tongs or drainer spoon. Use a flat-bottomed glass or the flat side of a meat tenderizer and squish it flat. Then place back in the oil, and fry each side until browned. Place on paper towels and sprinkle with salt. Let cool enough so you don't burn your mouth!! (BTDT). These do not reheat well, so enjoy while hot or warm!
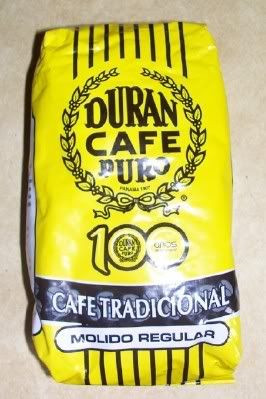
Foreign coffee isn't something one usually gets to see to often. Here's your chance. My Aunt brought this back after a recent trip to visit her Mom and other relatives. After a taste test, I'd say this one is fairly similar to what we regularly drink (MJB European Roast). It's ground a little finer, so didn't work so well in my reusable filter.
Plantanos
Several plantains
oil - enough for a level of about 3 inch inches.
salt
Heat oil in a wide frypan, electric frypan or in your electric frycooker. Peel plantains and slice about 1 1/2 inches thick. Fry in hot oil until light browned, then flip and fry the other side. Lift out with tongs or drainer spoon. Use a flat-bottomed glass or the flat side of a meat tenderizer and squish it flat. Then place back in the oil, and fry each side until browned. Place on paper towels and sprinkle with salt. Let cool enough so you don't burn your mouth!! (BTDT). These do not reheat well, so enjoy while hot or warm!
Foreign coffee isn't something one usually gets to see to often. Here's your chance. My Aunt brought this back after a recent trip to visit her Mom and other relatives. After a taste test, I'd say this one is fairly similar to what we regularly drink (MJB European Roast). It's ground a little finer, so didn't work so well in my reusable filter.
Friday, May 11, 2007
It's Rhubarb Time!
Today, we'll visit with one of my most cherished family desserts: Rhubarb Crunch Pie. We use rhubarb brought over from Finland by my great-Grandfather Heikke (Henry) Hannunp Kupunen in 1903. It's very easy to propogate. My sister and cousin are now keepers of the rhubarb, although we have a few plants here at the homestead. You can use frozen, which really isn't a choice if you live in the South or either coast where it just doesn't get cold enough to grow. Normally, we can only pull rhubarb twice a year over a couple of weeks, but this year, it came up early (made some this a.m.), so I expect to get an extra crop before the end of June. Serve with a dollop of cream or Cool Whip. Good warm or room temperature. The recipe comes from a 1965 church cookbook that is so old and worn that the covers are gone.
Rhubarb Crunch Pie
1 cup sifted flour
1 cup brown sugar
1 tsp. cinnamon
2 cups oatmeal
1/2 cup melted shortening (I currently use margarine or butter)
Mix until crumbly, spread 1/2 on bottom of greased 13 x 9 inch pan.
Filling:
1 cup sugar
1 teaspoon vanilla
1 cup water
2 tablespoons cornstarch
6 cups cut up rhubarb
Mix sugar, vanilla, water and cornstarch and cook on low-medium until clear; Add rhubarb and mix well. Pour over pie shell and cover with remaining crumbs. Bake 350 degrees about 1 hour.
Notes: if you want just a 9 inch deep dish pie, use only 3/4 cup oatmeal, 1/4 cup shortening and 4 cups rhubarb. Bake 1 hour. Rhubarb cooks down, so if your pie plate looks way overfilled, that's not a problem! Also, Mom recently has started just laying out the rhubarb and just pouring the filling over it evenly. That seems to work well for her and is actually easier, but I still mix it separately.
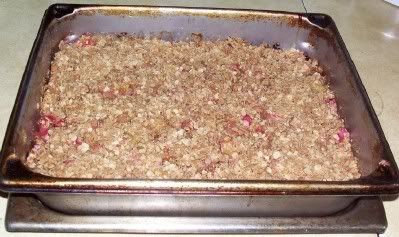
Rhubarb Crunch Pie. That burnt on film along the top edges is what happens when you use PAM instead of shortening to grease. I could never understand why all the glass dishes had so much of that brown stuff. Not only is it ugly for presentation, but it's tough to get off. Pam is a mist and doesn't go just where you want it to go. It goes everywhere. Keep that in mind!
Also in the works today was getting several cookbooks in the mail. I'm a big fan of Taste of Home magazine and recently they had a sale to try and make room in their warehouse. So, got a bunch of cookbooks cheap! These are my latest 3.


Rhubarb Crunch Pie
1 cup sifted flour
1 cup brown sugar
1 tsp. cinnamon
2 cups oatmeal
1/2 cup melted shortening (I currently use margarine or butter)
Mix until crumbly, spread 1/2 on bottom of greased 13 x 9 inch pan.
Filling:
1 cup sugar
1 teaspoon vanilla
1 cup water
2 tablespoons cornstarch
6 cups cut up rhubarb
Mix sugar, vanilla, water and cornstarch and cook on low-medium until clear; Add rhubarb and mix well. Pour over pie shell and cover with remaining crumbs. Bake 350 degrees about 1 hour.
Notes: if you want just a 9 inch deep dish pie, use only 3/4 cup oatmeal, 1/4 cup shortening and 4 cups rhubarb. Bake 1 hour. Rhubarb cooks down, so if your pie plate looks way overfilled, that's not a problem! Also, Mom recently has started just laying out the rhubarb and just pouring the filling over it evenly. That seems to work well for her and is actually easier, but I still mix it separately.
Rhubarb Crunch Pie. That burnt on film along the top edges is what happens when you use PAM instead of shortening to grease. I could never understand why all the glass dishes had so much of that brown stuff. Not only is it ugly for presentation, but it's tough to get off. Pam is a mist and doesn't go just where you want it to go. It goes everywhere. Keep that in mind!
Also in the works today was getting several cookbooks in the mail. I'm a big fan of Taste of Home magazine and recently they had a sale to try and make room in their warehouse. So, got a bunch of cookbooks cheap! These are my latest 3.
Sunday, May 6, 2007
Dump Cake
What can I say about this? Easy, tasty, simple. This particular recipe came from the 1995 St. Philips Lutheran Church Cookbook, Fridley MN.
Dump Cake
1 can cherry pie mix
1 large can crushed pineapple, undrained
1 large box yellow or white cake mix
2 sticks butter or margarine, cut into slices
1/2 cup chopped nuts
1/2 cup coconut
Dump into 9 x 13 inch pan in order listed. Top with chopped nuts and coconut. Bake in 350 F oven for 35 to 40 minutes. Serve warm or cold with whipped cream.
Thursday, May 3, 2007
Sausage Pasta Stew
We are in the midst of a cookbook upheaval. I'm trying to cut in half my collection of more than 400 cookbooks and booklets, while we continue to get some new ones. Mom's latest is Taste of Home's Contest Winning Recipes 2007. This was a slow cooker recipe that seemed weird, but turned out tasty! It makes a LOT (filled the crock pot). Use any sausage that you want. I used Jimmy Deans Bulk Original Recipe sausage, but otherwise I would consider something like the Hot Italian sausage sold in bulk at your grocery store. Oh, and the red bell pepper really works in this stuff better than the green. My changes. I had no summer squash so added some leftover tomatoes from a salad. I also used canned peas. If you need this meal in a shorter time and even without a slow cooker, parboil the carrots, then put everything together as instructed. I just used wavy pasta rather than spiral. It's what I had in the cupboard.
Sausage Pasta Stew
(Sarah Bowen, Upland, CA)
1 pound turkey Italian sausage links, casings removed
4 cups water
1 jar (26 oz). meatless spaghetti sauce
1 can (16 oz.) kidney beans, rinsed and drained
1 medium yellow summer squash, halved lengthwise and cut into 1 inch pieces
2 medium carrots, cut into 1/4 inch slices
1 medium sweet red or green pepper, diced
1/3 cup chopped onion
1 1/2 cups uncooked spiral pasta
1 cup frozen peas
1 teaspoon sugar
1/2 teaspoon salt
1/4 teaspoon pepper
1. In a nonstick skillet, cook sausage links over medium heat until no longer pink; drain and place in a 5 qt. slow cooker. Add water, spaghetti sauce, kidney beans, summer squash, carrots, red pepper and onion. Mix well. Cover and cook on low for 7-9 hours or until vegetables are tender.
2. Stir in the pasta, peas, sugar, salt and pepper; mix well. Cover and cook on high for 15-20 minutes or until pasta is tender. Yield 8 servings.
1 1/3 cup = 276 calories, 38 g carb, 6 g fiber, 18g protein.
Subscribe to:
Posts (Atom)