Been a while since I posted. Sorry about that. I bought "The Church Supper Cookbook" edited by David Joachim off Ebay for my Mom and this was the first recipe she tried. She followed the recipe exactly the first time and there just wasn't a strong enough apple flavor. She used more apple and that resolved the problem. I recommend always using Minute Maid orange juice. It's the only brand that I know for certain doesn't add sugar; never sickly sweet and plenty of orange flavor.
Apple Coffee Cake
Laura Goodenough, The Congretional Church, Winchester Center, CT
5 tablespoons sugar
2 teaspoons cinnamon
3 cups flour
1 cup sugar
1 cup cooking oil
4 eggs
1/4 cup orange juice (use Minute Maid)
2 1/2 teaspoon vanilla
3 teaspoons baking powder
1 teaspoon salt
5 apples, peeled, cored and thinly sliced
Combine sugar and cinnamon and set aside. In large bowl, combine flour, sugar, oil, eggs, orange juice, vanilla, baking powder, and salt. Beat well. Grease 10 inch tube pan. Pour in one-third of the batter, half the apples, and one-third of the cinnamon and sugar alternatively until all ingredients are used. Bake at 350 F for 1 hour and 10 minutes.
Sunday, December 23, 2007
Wednesday, August 29, 2007
Midwestern Hot Dish
This is the traditional Midwestern Chop Mein Hot Dish that many of us grew up on from Minnesota all the way down to Texas. Still yummy. There are many versions of this but they vary very little. Those of you who have gourmet leanings probably will pass this one by, but I urge you to try it once. Haven't met a single person who hasn't liked this. The only thing I alter on this recipe is to use reduced-salt soy sauce and lean hamburger (then I don't have to drain it).
Chow Mein Casserole
1 1/2 - 2 cups chopped celery
1 onion, chopped
1 pound hamburger
1 can cream of chicken soup
1 can cream of mushroom soup
1 (4 oz.) can mushrooms
3 tablespoons soy sauce
1 cup rice
2 cups boiling water
salt and pepper to taste (personally, I think there is enough salt)
chow mein noodles
Brown hamburger and onion. Drain if hamburger is not lean. Put boiling water into bowl and add rice. Let sit for 3 minutes. Mix all ingredients into hamburger/onion mixture. Pour into 2 qt. casserole dish. Top with chow mein noodles. Bake uncovered at 350 F for 1.5 hours. Serve with a mixed salad. Serves 6.
Sunday, August 19, 2007
Cranberry Nut Bread
Yes, I know it's not the season, but hey, at least you will have this recipe in advance. The cookbook is going, but the recipe is now yours! My favorite cranberry nut bread recipe is very similar, but the quantities are just a little different. This recipe comes to you from the Minneapolis Tribune 3rd annual food contest back in the 1980s (before it became part of the Strib). This particular version was provided by Joyce Bruce of Redwood Falls, MN
Cranberry Nut Bread
2 cups flour
1 cup sugar
1 1/2 tsp. baking powder
1/2 tsp. soda
1 tsp. salt
1/4 cup shortening
3/4 cup orange juice
1 tablespoon grated orange rind
1 egg, well beaten
1/2 cup chopped nuts
1 to 2 cups chopped cranberries
Sift together flour, sugar, baking powder, soda and salt. Cut in the shortening until the mixture resembles course corn meal. Combine orange juice and grated rind with well beaten egg. Pour all at once into dry ingredients. Mix just enough to dampen. Carefully fold in chopped nuts and cranberries.
Spoon into a greased lost pan, 9 x 5 x 3 inches. Spread corners and sides slightly higher than the center. Bake at 350 degrees about 1 hour until the crust is golden brown and a toothpick inserted comes out clean. Let rest 5 minutes. Remove from pan and cool on the rack.
I often make smaller loaves and then wrap in foil as gifts. Freezes well.
Notes: If you don't have the orange rind, you can skip it, but it really adds to the flavor. Unlike lemons, freshly grated orange rind can be quite bitter depending on the orange, so don't be afraid to just use the dried stuff.
Sunday, July 29, 2007
Tasty Roasted Chicken
Another hot day and chicken was on the menu. Due to the heat, I chose to 'bake' the chicken in an electric roaster outside. Worked great and chicken was very tasty and more moist than if I had used a conventional recipe. Another keeper recipe! Better yet, it includes ingredients you are likely to already have on hand. The recipe below reflects the same ingredients, but I only included the roaster information. Enjoy!
Tasty Baked Chicken
Betty Reuter, Taste of Home Test Kitchens
1 broiler/fryer chicken (3 to 4 pounds) cut up (I removed skin)
1 teaspoon salt
1/2 teaspoon dried tarragon
1/2 teaspoon paprika
1/4 teaspoon pepper
1/4 cup dry sherry (I used a white Zinfandel)
3 tablespoons lemon juice
2 teaspoons soy sauce
2 shallots, chopped (I used green onions)
1. Place the chicken in a greased roaster. Sprinkle with salt, tarragon, paprika and pepper. Combine with sherry, lemon juice and soy sauce; drizzle over chicken. Top with shallots
2. Roast, covered, at 350 F until chicken is done (about 2 hours). Meat thermometer should read 180 F. Yield 4-6 servings.
Tuesday, July 24, 2007
Bobby's Goulash
I'm a fan of Food TV. Not all of the shows and certainly not all of the recipes, but it is enjoyable to watch and see what others make. I particularly enjoy Paula Deen's methods of cooking. As mentioned in early posts, I'm a big fan of Southern cooking (I had a boss from Georgia, I guess I can blame him). I was looking for an easy, top-of-the-stove recipe that I had everything in hand. That day, Paula was featuring her son Bobby's favorite foods for his birthday. Ok..gotta try it. Very tasty, but WAY to spicy hot. Could this be because I substituted hot Italian sausage for the ground turkey? Could be. I never buy ground turkey. I have hot Italian sausage a lot, so I think it's really because there was a mistype and only 1 teaspoon of House seasoning was supposed to be in there and not a whole tablespoon. The amount of salt seemed way too high and I used Mrs. Dash, but I think if you only use 1 tsp. House Seasoning, you can go ahead and use whatever you use for seasoned salt (Lawryrs for instance). This recipe is really worth a try. Even my sister, the vegetarian, liked this stuff (her portion had no meat, but she would have liked her Morning Star Crumbles in it). Fast, fast, fast to make and definitely man friendly. By the way, the house seasoning is really good in hamburgers too.
OH, and a tip. If you have too hot peppers (capsicums), use milk or dairy product to cut the heat. If it is excessive black pepper, you use lemon and a little sugar.
Bobby's Goulash
Paula Deen, Food Network 2007
2 pounds lean ground beef
1 pound ground turkey (I used Italian sausage)
2 large onions, chopped
3 cups water
1 (29 oz) can tomato sauce
2 (15 oz) cans diced tomatoes
3 cloves garlic, minced
3 bay leaves
3 tablespoons soy sauce
1 teaspoon House Seasoning, recipe follows
1 tablespoon seasoned salt (I used Mrs. Dash)
2 cups dried elbow macaroni
In a Dutch oven, saute the ground beef and ground turkey over medium-high heat until no pink remains. Break up meat while sauteing; spoon off any grease. Add the onions to the pot and saute until they are tender, about 5 minutes. Add 3 cups water, along with the tomato sauce, tomatoes, garlic, Italian seasoning, bay leaves, soy sauce, House Seasoning and seasoned salt. Stir well. Place a lid on the pot and allow this to cook for 20 to 25 minutes. (if using fresh tomatoes, add about 10 min. to cooking time).
Add the elbow macaroni, stir well, return the lid to the pot, and simmer for about 20 minutes. Turn off the heat, remove the bay leaves and allow the mixture to sit about 30 minutes more before serving.
Deen House Seasoning
1 cup salt
1/4 cup black pepper
1/4 cup garlic powder
Mix ingredients together and store in an airtight container for up to 6 months.
http://www1.foodtv.com/celebrities/deenbio/0,7543,,00.html
Monday, July 23, 2007
New Food Search Engine
Last couple of recipes were nothing to blog about. However, on our local TV News, a reporter reviewed the Foodie Search Engine. It is an independent search engine that seeks out recipes, lists ratings (if they exist) and saves in your own recipe box. There is a separate section for restaurants in some major cities. They don't have many cities listed yet, but I wasn't surprised to see Joe's Seafood Prime Steak & Stone Crab in Chicago as a top restaurant. I mostly went to dives and Mom&Pop shops to eat when in Chicago, but my ex-guyfriend treated me to steak. Yowza that was yummy! Anyway, you can provide your own review/experience of any restaurant listed. Other things I've found on the site include links to many of the most popular recipe sites, as well as links to famous chef/cook sites.
The location of the search engine is www.foodieview.com. It will give you a couple of hours of enjoyment while you research whatever you might want for dinner!
The location of the search engine is www.foodieview.com. It will give you a couple of hours of enjoyment while you research whatever you might want for dinner!
Thursday, July 12, 2007
Peanut Butter Bars
Moms all over the country used to make this all the time. Maybe you lost the recipe. Here it is. Still yummy! Still easy to do. A great summertime treat. It is no-bake although you'll need to heat the oven a couple of minutes to melt the topping. I prefer to use Special K, but really, any cornflake works.
Peanut Butter Bars
1/2 cup light Karo syrup
1/2 cup sugar
1 cup peanut butter (chunky or smooth)
1/2 cup peanuts (salted or not)
3 cups cornflakes
1 package chocolate chips (can use less)
Bring Karo syrup and sugar to a boil. Boil one minute. Mix in the peanut butter, peanuts and cornflakes. Pack into greased 9x13 inch pan. Pat with wet hands. Sprinkle chocolate chips on top; then slip into oven two minutes to melt chips. Spread chocolate with rubber spatula and cut into squares.
Moroccan Chicken
In the interests of finding more recipes to make in the crockpot when it's too hot to bake or just because, here's one my Mom tried out of my Betty Crocker Slow Cooker Cookbook. While the recipe recommends drumsticks, I was pleased that even the chicken breast didn't fall apart into a disassociated stew. It was clear though, that this recipe shines better when using dark meat. Save the chicken breast for something else. I really like the spicy version of this dish, but you need to use an adaptation for a slow cooker or it comes out like mud. For a little more kick, add a small amount of grated ginger.
Moroccan Chicken
Betty Crocker Slow Cooking Book
8 chicken drumsticks (about 1.5 lbs), skin removed
1 can (8 oz) pineapple tidbits or chunks in juice, undrained
1 large onion, chopped (1 cup)
2 cloves garlic, finely chopped
2 tablespoons lemon juice
1 teaspoon salt
1 teaspoon marjoram leaves
3/4 teaspoon crushed red pepper
1/4 teaspoon ground turmeric
1 tablespoon cornstarch
1 tablespoon cold water
1/4 cup sliced pimiento stuffed olives
1 tablespoon chopped fresh parsley
1. Place chicken in 5-6 quart slow cooker. Mix pineapple, onion, garlic, lemon juice, salt marjoram, red pepper and turmeric; pour over chicken.
2. Cover and cook on low heat setting 4 to 5 hours or until juice of chicken is no longer pink when centers of thickest pieces are cut. Remove chicken from cooker using slotted spoon; place in serving dish. Cover to keep warm.
3. Remove fat from sauce. Mix cornstarch and water; stir into sauce
4. Cover and cook on high heat setting about 15 minutes or until thickened. Stir in olives.
5. Pour sauce over chicken. Sprinkle with parsley.
Here's some other versions that do not use a slow cooker.
Here is another recipe for Moroccan Chicken. Equally as good but uses paprika as the main spice.
http://www.cooks.com/rec/view/0,1718,129179-250198,00.html
If you want real Moroccan Chicken, this is very close to the one used by my former Co-worker who lived in Morocco for 20 years.
http://www.theelegantchef.com/north_africa_chicken.html
Another that is much spicier.
http://www.recipezaar.com/207154
Monday, July 9, 2007
Pineapple Bran Muffins
I don't know about you, but most every bran muffin I have ever eaten is just plain nasty unless it has plenty of oil or sugar. That doesn't help if you are trying to eat healthy though.
Years ago, I tried the 8 Week Cholesterol Cure by Robert Kowalski. Yep, it works. Dropped my cholesterol down about 50 points just increasing my exercise to a daily 20 minute walk and eating three bran muffins daily. Maybe not as good as Lipitor, but if you only have marginally high cholesterol, you can bring it down with the tips in this book, which is now pretty much out-of-date. For instance, eggs are no longer considered to be the bugaboo they were a decade ago. Niacin, while sold OTC, can cause worse problems than the original cholesterol problem. The best thing I got out of this book was a healthy, but yummy, bran muffin recipe. Not all of his bran muffin variations worked for me, but the Pineapple Bran Muffin was a winner! By the way, on the bad side of 3 muffins a day is all the gas it produces. Your body gets used to that in 2 weeks, but it was annoying. I use Quaker Oat Bran cereal for these muffins.
Pineapple Bran Muffins
2 1/4 cups oat-bran cereal
1/4 cup brown sugar
1 tablespoon baking powder
1/2 cup evaporated skim milk or skim milk
2 - 8 oz. cans crushed pineapple in its own juice (unsweetened)
2 egg whites or 2 oz. egg substitute
2 tablespoons vegetable oil
Preheat oven to 425 F. Mix the dry ingredients in a large bowl. Mix the milk, 1 can of crushed pineapple with juice, egg whites and oil in a bowl or blender. Combine the ingredients and mix. Drain the second can of pineapple and add to the mixture. Line the muffin pans with paper baking cups and fill with batter. Bake for 17 minutes. Make 12 muffins.
If you are short on ingredients, use whatever milk you have in the fridge and substitute the 2 egg whites with one egg. If you have a 20 oz. can, drain all the pineapple and use 1/2 cup of juice and most of the pineapple.
Chicken Mole
Ever since seeing the movie Chocolat, I've thought about making some of the recipes mentioned during the decadent chocolate party. Chicken Mole is one of the most unusual recipes I've tried in a long time. Chocolate and chicken? Seems like an odd combo. Adding in chili powder? Definitely weird. But I liked it! Not only that, but this recipe is quite low in calories! Imagine that! On my blog!?
This recipe was originally from Nestle and printed in one of those cookbooks that contain recipes from the backs of bags, boxes, cans and bottles of commercial food products. I took out about 25 pages of recipes I wanted to try and sent the rest of the book to the garage sale (there are 300 pages, so someone else will enjoy the rest!). This particular recipe is based on tomatoes rather than white sauce, which is why it's low on calories. Great on flavor though! The next time I make this, I would prefer deboned chicken. I could tell that Mom wasn't excited over it, but it is a very different flavor combo than we're accustomed to. The recipe below has been adapted for only 1 chicken. The coating amounts are generous. I used New Mexico Light blend chili from Pendery's (see link in sidebar). This is a good chili blend that doesn't burn (which is great for us wimpy folk). I also used diced tomatoes and pureed them with my hand blender (for very smooth, use a blender). Instead of chicken bouillon, I use Penzeys' chicken base (see link in sidebar) which is a little lower in salt than bouillon. If you are on a no-salt diet, you can skip the salt in both the coating and drop out the bouillon in the sauce. Still going to be pretty close. Using baking cocoa/chocolate will make this low carb. You can puree leftover sauce and pour over ice cream. Yum.
Chicken Mole
Chicken:
1/3 cup unsifted flour
1 tablespoon chili powder
2 teaspoons salt
1/2 teaspoon pepper
1 broiler-fryer (2 1/2-3 lbs), cut up
2 measuring tablespoons vegetable oil
1 cup chopped onion
3 garlic cloves, minced
1/4 cup water
Chocolate Mole Sauce:
2 1/4 teaspoons chili powder
1/2 of 10 oz. can tomatoes and green chilies (I used Rotel tomatoes)
1/2 cup tomato puree
3 oz (1/2 cup) Nestle Semi-sweet Real Chocolate Morsels
1 tsp chicken-flavored instant bouillon (or 1 cube crushed)
Chicken:
In a large bowl or plastic bag, combine flour, chili powder, salt and pepper. Add chicken pieces (2 at a time); coat well. Heat oil in a large skillet; brown half the chicken pieces on all sides over medium heat. Drain thoroughly on paper towels. Repeat with remaining chicken. Pour off all but 2 teaspoons of oil (may need a little more oil if not using non-stick). In same skillet, saute onion and garlic until golden. Return chicken to skillet. Add the water; simmer, covered, over medium heat about 35 to 40 minutes or until chicken is tender. Transfer to a serving platter. Top with Chocolate Mole Sauce. Garnish each serving with peanuts or almonds, if desired.
Chocolate Mole Sauce:
In a small saucepan, combine tomatoes and green chilies, tomato puree, chocolate morsels, remaining chili powder and bouillon. Cook over low heat until morsels melt and sauce is heated through.
Makes 4 servings with 1 1/2 cups sauce.
Note: This mole is milder in flavor than a traditional Mexican mole.
After searching on the net for similar recipes, try adding 1/2-3/4 tsp. cinnamon and/or 2 tablespoons of peanut butter for variation.
Friday, July 6, 2007
Penne with Spicy Chicken Alfredo
I have never before purchased a book by Sandra Lee of Semi-homemade Cooking fame but happened to gander at this one called 20 Minute Meals. I've seen her previous cookbooks and saw some of the reviews and agreed. Many of her recipes are just too unhealthy or not particularly budget conscious. The recipes in this book looked considerably better and fitted my budget, food choices and occasional time constraints. Tonight was the first recipe. We loved it! Definite keeper recipe.
First, the pasta. I didn't even notice that it said 'mini' penne pasta. I just used regular size. You can use Mostaccioli also. It's the same thing without ridges. I had a coupon for the Classico Alfredo Sauce. It's $2.85 for a jar. Yes, to you gourmet types, you can make your own alfredo sauce (see link at bottom)! You need about 2 cups of sauce. Commercial Alfredo Sauce is nearly half the calories of homemade. Finally, instead of packaged chicken strips, I just used fresh chicken breasts, a little salt and pepper, browned a little with olive oil, covered and cooked. I let it cool a few minutes, then sliced into strips. If you have cubed, precooked chicken in your freezer, that would work fine in this recipe and keep you to 20 minutes cooking time. Even cooking the chicken, this was ready in 30 minutes once the ingredients were assembled. The original recipe asked for a 2.5 oz. can of olives. I used a 6 oz. and was glad. I love olives!
FAST, 20 minute recipe.
Penne with Spicy Chicken Alfredo
8 oz. penne pasta
1 jar (16 oz) Alfredo sauce (I used Classico brand)
1 can (14.5 oz) diced tomatoes with Italian spices (can use regular diced also)
1 tablespoon Italian seasoning
1/4 teaspoon red pepper flakes (original asked for 1/2 which was too much for me)
12 oz precooked chicken breast, sliced into strips
1 can (6 oz) sliced black olives, drained
1. In a large pot of boiling salted water, cook pasta according to package directions. Drain well; return to hot pot. Cover; keep warm
2. Meanwhile, in a medium saucepan, combine Alfredo sauce, tomatoes, Italian seasoning, and red pepper flakes over medium heat. Stir in chicken and olives. Bring to a simmer; cook for 10 minutes.
3. Serve hot over cooked pasta. Top with Parmesan cheese. Makes 4 servings.
Homemade Alfredo Sauce
Here's a link to America's Test Kitchen Alfredo recipe. Please note that they tested fresh Parmesan cheeses and found DiGiorgno to be as good as Parmigiano-Reggiano for a lot less money.
http://www.foodreference.com/html/fett-alfredo-807.html
Wednesday, July 4, 2007
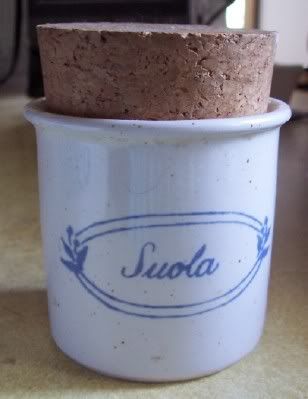
Kitchen Stuff
Kitchen stuff can be fun and useful. My scrapbooking buddy, Helle, who hails from Finland, brought this as a gift for my Mom, who spoke only Finnish until she was 7 (alas, she only remembers a few words now). Helle's mom has had the very same style crock on her stove for years. I guess they are popular in Finland. Sure gets used a lot!
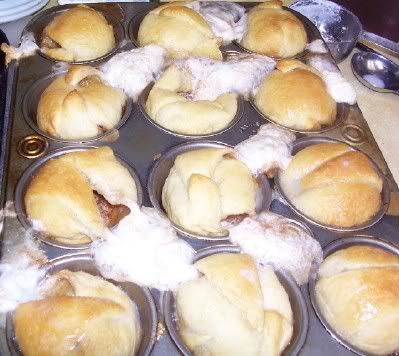
Normally, you only see cooking successes on my blog. Here was a disaster. This was a supposed fast-to-make treat using refrigerated crescent rolls and cinnamon coated marshmallows. Doesn't work in my oven as you can see. I even had the temp 25 F less because I thought this might happen. Everybody liked the flavor of the failures, but I guess we'll just go back to Monkey Bread. Yes, folks, I have TOSSED a recipe!
Normally, you only see cooking successes on my blog. Here was a disaster. This was a supposed fast-to-make treat using refrigerated crescent rolls and cinnamon coated marshmallows. Doesn't work in my oven as you can see. I even had the temp 25 F less because I thought this might happen. Everybody liked the flavor of the failures, but I guess we'll just go back to Monkey Bread. Yes, folks, I have TOSSED a recipe!
Cutting Up Watermelon
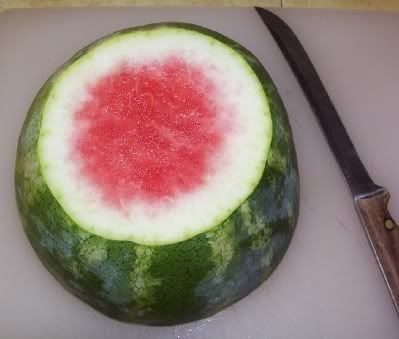
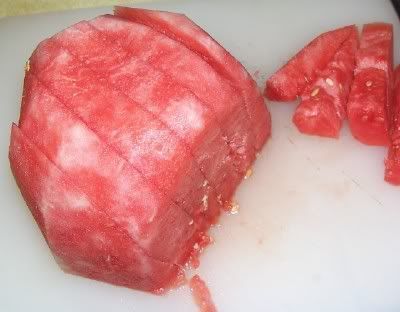
I learned how to cut up a watermelon on Food TV a few years ago. Easy and fast. I use the same technique for cantelopes and melons as well. Watermelon is relatively cheap right now and oh so delicious! Well, so are cantelopes. Here's what to do. Tools: Knife, large cutting board, paper (to place your rind it for easy removal) and large bowl for watermelon cubes. I find a long knife works better than anything else. In this case, it's a Chicago Cutlery knife--they are thick and don't bend which always scares me with other knives. I'm just waiting for the day one snaps while cutting! Mostly though, they tend to get stuck halfway through halving the melon. OK, First, cut your watermelon in half. Then cut the end off. You want that pink stuff showing!
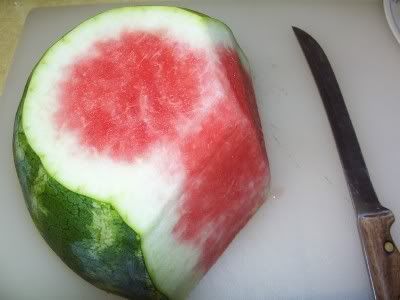
Start slicing down the side, curving slightly with the shape of the melon. Cut away all the white pithy stuff.
To get even chunks, slice down evenly. Then slice those strips into even chunks. Now do the other half the same way. You are done. Place in a big bowl.
If your watermelon isn't at the tip of sweetness, sprinkle on a little salt. There you have it. My method. Takes about 5 minutes for each half. If you are only serving a few people, leave the other half intact until ready to use. Keeps the watermelon fresher.
Spaghetti Sauce
I never watched the Sopranos, but did happen across the Sopranos Family Cookbook at the library. Since the recipe seemed similar to the spaghetti sauce recipe I wanted to try from an Italian cooking show on PBS, I chose that first. I don't like shredded meat, so next time would substitute using spare ribs, italian sausage, and hamburger and I would use less because my final result was too meaty. The full quantity of ingredients in the original recipe would not fit into my 5 quart crock pot, which is the only non-reactive large pot that I had, so we used Mom's 6 quart Caphalon Dutch oven (great pans, but they are ugly). The adaptation below uses less meat, but consider draining more juice and adding back after the tomato has cooked down so that your pot doesn't overflow. I wouldn't hesitate to use fresh tomatoes. I found it easier to puree the tomatoes (with juice) in a 2 quart pitcher in batches using my hand blender. The original recipe required that you take out the meat and set aside for another time. Naw, I don't think so. Also, while the original uses fresh basil, I only have that if my sister grows it. She didn't this year. So, I go with dried.
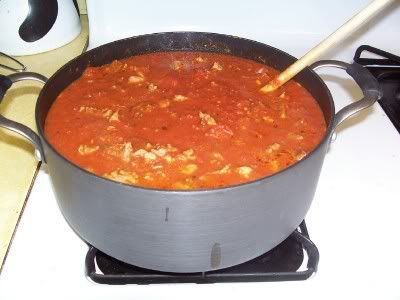
This is what the original reciope looked like while cooking.
Sopranos Sunday Gravy (Stephanie's adaptation)
2 tablespoons olive oil
1/2 pound spareribs, cut apart
1/2 pound hamburger
1 pound bulk, fresh italian sausage
4 garlic cloves, minced
1/4 cup tomato paste (I used all of a small can)
Three 28 to 35 oz. cans Italian peeled tomatoes or 6 lb. can diced tomatoes OR diced fresh or frozen
salt and freshy ground pepper
1 tablespoon plus 1 tsp. dried basil (divided)
Heat the oil in a large heavy pot over medium heat. Place the pieces of the spare ribs in the pot and brown, turning occasionally for about 15 minutes or until nicely browned. Transfer to plate. Brown hamburger and sausage. Set with the pork.
Drain off most of the fat from the pot. Add the garlic and cook about a minute or until golden. Stir in tomato paste and cook for 1 minute. Drain tomatoes until you have 1 cup of juice. Puree tomatoes with remaining juice using hand blender (or in stages using blender) and pour into pot. Add salt and pepper to taste. Add 1 tablespoon dried basil. Add meat. Stir. Bring sauce to a simmer. Cook over low heat, stirring occasionally for 2-4 hours (6-8 if using open crock pot). If the sauce becomes too thick, add a little of the leftover juice or water. 15 minutes before done, add 1 tsp. dried basil and mix. Serve over spaghetti or use for lasagna.
If you really like that Dutch Oven, you can buy it at Amazon. It's called Calphalon Everyday Nonstick 6-Quart Dutch Oven.
Monday, June 18, 2007
Fish Turbot
I originally found the recipe for Fish Turbot when I needed to empty my freezer and had a package of frozen mystery whitefish. This casserole works with any kind of fish really, although I prefer whitefish or bass over say tuna or salmon in this. The recipe is from the Betty Crocker Picture Cookbook (1956 edition). I've just listed it verbage style because amounts aren't really that particular here. Feel free to use thinned Cream of Mushroom soup instead of white sauce. Mace really makes this dish, but if you don't have any, you can use a teeny amount of nutmeg. Mace is a fine membrane around nutmeg, but has a milder flavor.

We're going to need a bigger boat. -Jaws (This is not my photo, but isn't it a scream!?).
Fish Turbot
Make Medium White Sauce seasoned with onion salt, minced parsley, lemon juice, mace and 1 egg yolk to each cup of sauce. Flake the fish. In a buttered casserole dish, arrange alternate layers of flaked, cooked fish with the medium white sauce. Top with oyster crackers and bake in 400 F oven until browned on top (about 25 min.). Serve hot.
I prefer to use oyster crackers for each layer, but this only works if you have a narrow casserole.
Medium White Sauce (makes about a cup):
2 tbsp. butter
2 tbsp. flour
1/4 tsp. salt
1/8 tsp. pepper
1 cup milk
Melt butter in small saucepan on med. heat. Add flour, salt and pepper and cook for 1 minute, stirring occasionally. Slowly add the milk, stirring to prevent lumps.
Sunday, June 17, 2007
Muffuletta Sandwich
I'm still in the process of transferring recipes from the old blog to this one as I make them. It's been too hot to bake, so here's a great sandwich. Today, I'll focus on a recipe that originated in a New Orleans grocery deli and is served locally only at Muffulettas in St. Paul, MN (http://www.muffuletta.com/). My recipe comes from http://www.gourmetsleuth.com/Muffaletta.htm, but has been adjusted a little. The bread choice is not authentic, but easily available and not requiring me to bake it myself. The restaurant serves the sandwich on focaccia bread, which is then sliced into wedges. I recommend using canned anchovies-the paste just doesn't have the right flavor and you can freeze the remainder for later. I'm too lazy and cheap to search out and store cocktail onions, so I use chopped vadalias.
Muffuletta Sandwich
The Olive Spread
2/3 cup Green olives, pitted and -coarsely chopped
2/3 cup Black olives, pitted and -coarsely chopped
1/4 cup Pimiento, chopped
1/4 cup chopped Vadalia onion
3 Cloves garlic, finely minced
1 Fillet anchovy, mashed (can freeze remainder of can for later).
1 tablespoon Capers (chopped finely or mashed)
1/3 cup Finely chopped parsley
1 teaspoon Oregano
1/4 teaspoon Black pepper
1/2 cup Olive oil
1 tablespoon red wine vinegar
Mix all the ingredients together. Cover and allow to marinate over night or a minimum of 12 hours.
The Sandwich
1 large Loaf Italian Bread
1/3 pound Hard salami, very thinly -sliced
1/3 pound Ham, very thinly sliced
1/3 pound Provolone, thinly sliced
Slice loaf in half horizontally and slightly scoop out insides. Layer on salami, ham and Provolone. Spread on olive spread at least 3/4-inch thick. Replace top half of loaf and cut into serving size pieces.
Another version of this sandwich can be found at this site.
http://www.colorpro.com/great-sandwiches/muffuletta/recipe.htm#OliveSalad
Yet another, complete with bread recipe can be found at this site.
http://www.nolacuisine.com/
Saturday, June 9, 2007
40 Clove Chicken
If you've ever searched chicken recipes on the Internet, I'm sure you've found a gazillion versions of 40 Clove Chicken (I think the original came from the 1986 book, 365 Ways to Make Chicken by Cheryl Sedaker). I've made the one from Cheryl's book and it is yummy. I recently tried this one using just chicken wings and wow! Easy and yummy! One tip on the cloves. Use a chef's knife or similar large flat object and squash the clove. The peel comes right off. The clove will cook the same and be just as tasty as unsquashed, but you've saved a lot of time peeling. Serve this with crusty french bread, crackers or anything toasted and smear the softened clove over it.
40 Clove Garlic Chicken Wings
3 lbs chicken wings
1/8 cup olive oil
40 garlic cloves, peeled
1/2 teaspoon salt
1/2 teaspoon pepper
1/2 teaspoon rosemary
1/2 teaspoon thyme
1/2 teaspoon oregano
1 tablespoon Pernod (see note)
Preheat oven to 425 degrees F. Place wings in a single layer in large baking dish (9 x 13). Combine remaining ingredients and pour over wings, distributing garlic cloves. Cover, bake for 1 hour. Uncover and broil until browned.
Note: Pernod is a liqueur. Not all liquor stores carry it. I've included a link to the website so that you can substitute. Of course, you can leave it out entirely if you so choose.
http://www.pernod-usa.com/pernod_about.php
The recipe comes from this site.
http://www.garlic-recipes.com/cooking/2006-08-12/40-clove-garlic-chicken-wings-3120.shtml
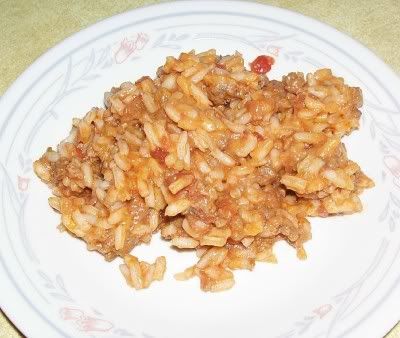
Tex Mex Rice
Sometimes reducing a collection can come back and bite you. I have only another week or so before the garage sale. As I eliminate cookbooks, I give them to my Mom (and then my sisters) to look through before it goes to the garage sale box. Today's recipe was certainly yummy and came out of one of those cookbooks. It was easy and tasty. Mom didn't want to heat up the oven so she made it on top of the stove in a large pan and the only thing changed is adding a little green onion. Mom ordinarily uses Spanish Rice for Stuffed Green Peppers, but this recipe is close enough to use it for the same thing, although since I like it spicier, I would use raw hot Italian sausage instead of the ground beef. So, I've included that recipe as well.
The Tex-Mex Rice recipe is from 100 Years and Still Cooking Centennial Cookbook from Trinity Episcopal Church Women of Pocatello, ID c 1998. My sister Patty will appreciate this as Pocatello, ID is not that far from Craters of the Moon National Monument and Preserve (a place she's been to). Here's a link to that site. http://www.nps.gov/crmo/
Tex-Mex Rice
Em Gates; Trinity Episcopal Church, Pocatello, ID
1 pound ground beef
1 (10 oz.) can diced tomatoes and green chilies (like Rotel)
1 (8 oz) can tomato sauce
1/2 cup chopped green onions (scallions)
1 1/2 cup grated cheddar cheese
1 cup uncooked rice
2 cups water
1 tsp. salt
Cook rice in salted water 30 minutes. Brown ground beef until meat is no longer pink. Add tomatoes and chilies, onions, and tomato sauce. Add cooked rice and mix well. Transfer mixture to an 8x8 inch baking pan; cover with grated cheese. Bake at 325 F for 35-40 minutes. Serves 4.
Mom cooked on top of stove with a large non-stick pan leaving the cover ajar. If you only have regular onions, add them to the ground beef while browning.
Stuffed Green Bell Peppers
Select peppers that are blocky so that they stand up. Substitute Hot Italian sausages (casings removed) for the ground beef in Tex-Mex Rice recipe. Cut open tops of green peppers and clean out all seeds and white ribbing parts. Boil peppers in water for 5 minutes. Remove. Stuff with the Tex-Mex Rice and place in casserole dish. Pour additional tomato sauce on top and around peppers. Bake at 350 for 45 minutes with cover or aluminum foil cover. Remove cover and bake another 15 minutes.
Thursday, June 7, 2007
Bread Pudding
Everybody has their favorite comfort foods and one of my favorites is Bread Pudding. Only my Mom, Uncle and I like this, so we always get to have plenty since nobody else does. It's a texture thing, I think. I'll try any version once, but this so far seems to be the best plain one I've found, although if you have a sweet tooth, you might want to add a tad more sugar. Louisiana Bread Pudding is a little dryer and uses a bourbon sauce, which is another favorite. I took this recipe from Epicurian II, (fundraiser for Church of the Epiphany, Coon Rapids,1983). Surprisingly, if you like dark breads and specialty breads, they actually make a better bread pudding. I made this one with leftover Raisin Bread. A note on milk. While you can use lower fat milk, the result is runnier. When I don't have whole milk on hand, I use what I have (typically 1%) and add some cream or half n half. Alternatively, use the 1%, but you'll need to add some melted butter to give the pudding body.
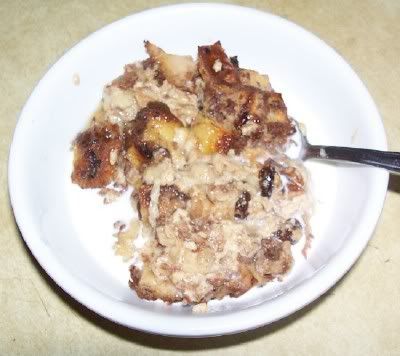
Bread pudding with half and half; looks awful. Tastes great.
Perfect Bread Pudding
Shirley Yake, Epicurian II
2 1/4 cups milk
2 beaten eggs
2 cups bread cubes
1/2 cup packed brown sugar (just a tad more is better)
2 tsp. cinnamon
1 tsp. vanilla
1/4 tsp. salt
1/2 cup raisins
Combine milk and eggs; pour over bread cubes. Stir in remaining ingredients. Spoon into 2 bread pans or an 8x8 pan; place pans in 1 inch water in 9 x 13 inch pan. Bake at 350 for 45 minutes.
Note: you don't have to use exact sizes, but a deep pan will take longer to bake than a wider pan.
Doubling Recipe: When I doubled this recipe, I added a little more sugar (about 1/4 cup more) and an extra egg and then split it between two casseroles. This was actually much improved and our preferred way now.
Here's a link to a very good adult-style, traditional New Orleans bread pudding.
http://frenchfood.about.com/od/cajuncreolecuisine/r/breadpud.htm
Here's a link to a recipe similar to what I've made in the past (I prefer rum over bourbon). I'm still testing new recipes before deciding on a favorite.
http://www.recipegoldmine.com/reglouis/louisiana6.html
Monday, June 4, 2007
My Rambling Chicken Soup Recipe
Everybody has their way of making chicken soup, usually learned from their Mom. I'm no different. Mom added things like Rotel tomatoes and green olives to leftover Thanksgiving Turkey soup, which really sets her soup apart from others. I continue to do that and found it works equally well with chicken. My soup varies from hers as I use barley and rice instead of pasta or potatoes. If there is leftover corn, peas or rice during the week, stick it into the freezer until you make soup. The leafy portion of the celery is particularly good for soup. I frankly don't like white meat in soup, so this is where I use wings, legs, and pretty much everything else. Freeze the liver, gizzard and heart for a stuffing; it makes the soup look more like goop. I eliminate the degreasing step by removing the skin prior to cooking. Don't be too particular. A little chicken oil adds to the flavor of the soup, but you don't want it looking like an oil spill. Also, I took a tip from Alton Brown (Good Eats) and now chop up and add those little dried up stubs of leftover cheese in the meat drawer (cut off any moldy bits). Mine is a quick to make soup. If you want the very rich chicken soup associated with Jewish mothers, you have to simmer the chicken, carrots, celery, onion and parsley 3-4 hours on low, but it uses the same basic ingredients without the bullion or soup base.
My amounts are approximate, so just adjust for your pot size. I use either a 3 qt. saucepan or a dutch oven. The whole green olives have more flavor than the presliced salad olives. Use only 1/4 can of Rotel tomatoes unless you really like hot. Alternately, use canned, frozen or fresh tomatoes, diced or chopped. If using potatoes, dice one or two and add. For pasta, use just a small handful or you will get stew. I prefer Orzo (100% semolina) by RiceSelect (in the natural foods aisle). It's an interesting melon shape. I do use rice, but usually only leftovers (even Rice a Roni works well). Just a small handful please! The chicken base has less salt, but feel free to use bouillon. You can get the really nice barley in the soup aisle, or get the not so pretty, but cheap barley in the natural foods section. I learned on an Italian cooking show to add another teaspoon of Italian spice 15 minutes before the end of your cooking time. Gives more of a fresh flavor. Finally, there is no reason why you can't use chopped beef in this recipe if what you have is leftover roast. Use Swanson's Beef broth as your base, but everything else is the same. It doesn't work so well with pork (cooked chopped italian sausage links work fine though, but use chicken base).

Stephanie's Chicken Soup
Pot, 1/2 full of water
Chicken parts, remove skin (can also use leftover turkey)
salt
pepper
Italian seasoning (1-2 tablespoons)
Fresh parsley, chopped, if you have it
jar of green olives, liquid reserved
1/4 can Rotel tomatoes (optional, but does give good zing)
chopped tomatoes (canned, frozen or fresh) (optional)
frozen corn or peas, or leftovers
carrots - 1-2 peeled and chopped
celery - 1-2 stalks chopped
onion - 1/2 onion chopped
pearled barley (handful or two, depending on size of pot)
1 tablespoon Chicken base (Penzey's Spices), or a can or two of Swanson's Chicken Broth
several handfuls of well-washed fresh spinach, added in final minutes (optional).
Fill half of pot with water and add chicken parts. Cook on med-low and cover for about an hour. Remove chicken. Let it cool a little while and then remove chicken from bones. Chop and place back into pot. Pour liquid from olives into pot and slice olives in half. Add everything to pot, top with either chicken broth or more water, and place on med-low heat. Cover. Cook for about 40 minutes or until pearl barley is done and vegetables are tender. If you want, add 1 tsp. of Italian seasoning 15 minutes before cooking is complete.
Link to Penzey's chicken soup base http://www.penzeys.com/cgi-bin/penzeys/p-penzeyssoupbase.html
This is another method of making soup that I just loved. It's different every time, but you don't waste any food in your fridge. Just set aside leftovers and make this once a week. Can also add cheddar cheese.
GARBAGE SOUP
Phyllis Diller, the Comedian
Home Alone Recipe #2 includes water, vegetables and herbs, and leftovers--including meat, spaghetti with sauce, spicy stir fry, mashed potatoes with gravy, and salad, all topped with Lawry's seasoned salt, herbs, and Parmesan cheese. No measurements, just whatever you've got.
Scientifically Proven Cold Soothing Chicken Soup
On Good Morning America (6/6/07), this author claimed to have concocted the best chicken soup recipe for a cold. I disagree with boiling; I think a simmer is a better choice and results in less vitamin loss. Also, to make this recipe, you need an 8 quart stock pot; if you only have a dutch oven, use a knife or kitchen shears and cut the chicken in half and halve the remaining ingredients.
http://abcnews.go.com/GMA/Recipes/story?id=3247169
My amounts are approximate, so just adjust for your pot size. I use either a 3 qt. saucepan or a dutch oven. The whole green olives have more flavor than the presliced salad olives. Use only 1/4 can of Rotel tomatoes unless you really like hot. Alternately, use canned, frozen or fresh tomatoes, diced or chopped. If using potatoes, dice one or two and add. For pasta, use just a small handful or you will get stew. I prefer Orzo (100% semolina) by RiceSelect (in the natural foods aisle). It's an interesting melon shape. I do use rice, but usually only leftovers (even Rice a Roni works well). Just a small handful please! The chicken base has less salt, but feel free to use bouillon. You can get the really nice barley in the soup aisle, or get the not so pretty, but cheap barley in the natural foods section. I learned on an Italian cooking show to add another teaspoon of Italian spice 15 minutes before the end of your cooking time. Gives more of a fresh flavor. Finally, there is no reason why you can't use chopped beef in this recipe if what you have is leftover roast. Use Swanson's Beef broth as your base, but everything else is the same. It doesn't work so well with pork (cooked chopped italian sausage links work fine though, but use chicken base).
Stephanie's Chicken Soup
Pot, 1/2 full of water
Chicken parts, remove skin (can also use leftover turkey)
salt
pepper
Italian seasoning (1-2 tablespoons)
Fresh parsley, chopped, if you have it
jar of green olives, liquid reserved
1/4 can Rotel tomatoes (optional, but does give good zing)
chopped tomatoes (canned, frozen or fresh) (optional)
frozen corn or peas, or leftovers
carrots - 1-2 peeled and chopped
celery - 1-2 stalks chopped
onion - 1/2 onion chopped
pearled barley (handful or two, depending on size of pot)
1 tablespoon Chicken base (Penzey's Spices), or a can or two of Swanson's Chicken Broth
several handfuls of well-washed fresh spinach, added in final minutes (optional).
Fill half of pot with water and add chicken parts. Cook on med-low and cover for about an hour. Remove chicken. Let it cool a little while and then remove chicken from bones. Chop and place back into pot. Pour liquid from olives into pot and slice olives in half. Add everything to pot, top with either chicken broth or more water, and place on med-low heat. Cover. Cook for about 40 minutes or until pearl barley is done and vegetables are tender. If you want, add 1 tsp. of Italian seasoning 15 minutes before cooking is complete.
Link to Penzey's chicken soup base http://www.penzeys.com/cgi-bin/penzeys/p-penzeyssoupbase.html
This is another method of making soup that I just loved. It's different every time, but you don't waste any food in your fridge. Just set aside leftovers and make this once a week. Can also add cheddar cheese.
GARBAGE SOUP
Phyllis Diller, the Comedian
Home Alone Recipe #2 includes water, vegetables and herbs, and leftovers--including meat, spaghetti with sauce, spicy stir fry, mashed potatoes with gravy, and salad, all topped with Lawry's seasoned salt, herbs, and Parmesan cheese. No measurements, just whatever you've got.
Scientifically Proven Cold Soothing Chicken Soup
On Good Morning America (6/6/07), this author claimed to have concocted the best chicken soup recipe for a cold. I disagree with boiling; I think a simmer is a better choice and results in less vitamin loss. Also, to make this recipe, you need an 8 quart stock pot; if you only have a dutch oven, use a knife or kitchen shears and cut the chicken in half and halve the remaining ingredients.
http://abcnews.go.com/GMA/Recipes/story?id=3247169
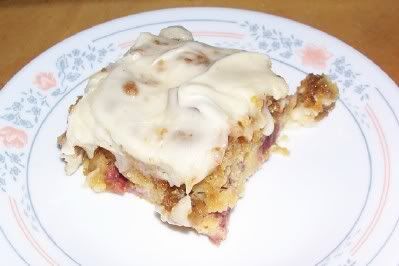
Rhubarb Strawberry Coffee Cake
The Saga of a Cookbook Fanatic continues. I've been working hard to reduce my cookbook collection to a more manageable size. It's mostly been easy. I've made something out of virtually every book that went; sometimes a keeper, sometimes good once or just OK. However, I do think eliminating so many makes my remaining collection a little more usable. I've enjoyed them, so now it's time for someone else to do so. I've gone down from over 400 to roughly 220 remaining cookbooks and booklets with about 10 with 3 to 6 recipes to try. Set those aside to start cooking or baking my way through them. My current collection is a LOT of Betty Crocker and Pillsbury, Taste of Home and of course the Southern Living Annuals and a few church type cookbooks. As mentioned in a prior post, my preference is American cuisine. There is also a smattering of Italian, Chinese and gourmet mostly cookbooks. This summer, I plan to do a lot of slow-cooking recipes. So far, I don't like any of the 8 hour recipes except beans, because I don't like fall-apart chicken or shredded beef or pork (it's a texture thing).
Got another of those little books at the grocery store last week (I'm a victim of my addiction) and already tried a recipe out of it! It's from Taste of Home Cake Mix Creations. I made a half a recipe of cream cheese frosting and spread it. Ok, way too rich. Don't do that. When she says drizzle 1/2 cup, yes, do keep it at half a cup. I like this recipe, but I would like to spice it up some. Maybe cinnamon and nutmeg? More nuts? Anyway, this is a very moist, rich coffee cake. I sliced my rhubarb into pieces between 1/4 and 1/2 inch. Seemed to work fine.
Rhubarb Berry Coffee Cake
Jackie Heyer, Cushing, IA
1 package (18.25 oz) yellow cake mix, divided
2/3 cup packed brown sugar
2 tablespoons butter
3/4 cup chopped walnuts
2 eggs
1 cup (8 oz) sour cream
1 1/2 cups finely chopped fresh or frozen rhubarb
1 1/2 cups sliced fresh strawberries
1/2 cup cream cheese frosting (Optional)
In a large bowl, combine 2/3 cup cake mix and brown sugar, cut in butter until crumbly. Add walnuts; set aside.
Place remaining cake mix in another bowl; add the eggs and sour cream. Fold in rhubarb and strawberries. Spread into a greased 13 x 9 x 2 inch baking dish. Sprinkle with reserved crumb mixture.
Bake at 350 F for 40-50 minutes or until a toothpick inserted near the center comes out clean. Cool on a wire rack. Place frosting in a microwave-safe bowl and heat for 15 seconds. Drizzle over cake. Yield: 12-15 servings
Editor's Note: if using frozen rhubarb, measure rhubarb while still frozen, then thaw completely. Drain in a colander, but do not press liquid out.
My note: to make such a small amount of frosting from scratch, either mix by hand or use a hand blender and a microwavable dish or cup. You need 2 oz. of cream cheese, 1 tablespoon butter, 1/4 tsp. vanilla and roughly 4 oz. powdered sugar. Soften the cream cheese and butter and cream together. Add vanilla. Mix in powdered sugar. You may need a little more depending on humidity and how thick you want it. Microwave for 15 seconds and drizzle over coffee cake.
Wednesday, May 30, 2007
French Onion Soup
I love French Onion Soup. However, over the years, I've never been able to make a really good French Onion Soup because I can't seem to do a good homemade beef broth (I got chicken down pat). I came across this book several years ago at Half Price Bookstore by Bob Bowersox, resident chef at QVC (Shopping Channel). Bob has a lot of experience as a chef having owned several restaurants, which he gave up to take up his post at QVC. The book, In The Kitchen With Bob: My Family's Best, is a compendium of his family's favorite recipes. His Dad's version of French Onion Soup is absolutely wonderful and just uses Swanson's Beef Broth. The secret is the caramelizing of the slow cooked onions. You can use chicken broth in this recipe, but then it's not French Onion, right?
Bowersox Onion Soup
8 medium to large purple onions (I used Vadalia)
4 tablespoons butter
2 10-3/4 ounce cans concentrated beef broth
1-1/2 cans of water
1/2 teaspoon salt
1 teaspoon Worcestershire sauce
1/2 loaf French bread, cut into 2" thick rounds
Mozzarella or Provolone (Dad's choice) cheese, thinly-sliced grated Parmesan cheese
1- Cut the onions into 3/8" slices, then cut the slices in half
2- In a 4-quart stockpot or Dutch oven, saute the onions in the butter. Do this very slowly, over a medium heat until deep, dark brown, with a thickened, almost caramelized texture without being burned. This can take anywhere from 20 minutes to 40 minutes.
3- Add the broth, water, salt and Worcestershire sauce and simmer until hot. Preheat the broiler.
4- Place 1 piece of the French bread in individual ramekins or high-sided, broiler-safe bowls. Ladle the soup over the bread until it is covered and the soup is near the top of the ramekin or bowls. Cover the ramekins or bowls with the cheese, and place under the broiler until the cheese is melted and beginning to brown on top. Serve with the grated cheese to sprinkle over the top. Makes 4-6 servings.
Here is a link to many of his other recipes. He has some of the best sauces I have ever tasted!
http://www.qvc.com/cd/cd_recipes_bowersox_111203.html?tmp=ddsn&cont=recipes
Tuesday, May 29, 2007
Update on Blog
I hope you are liking all these new photos! Never occurred to me to take photos while cooking, so I'll try to remember now. I've added links to places I actually buy from. You can save oodles of money buying spices and extracts mail order. I've also added a few recipe sites I like to frequent.
King Arthur Flour - Used this flour as a kid when living in semi-rural Massachusetts. They have recipes and stuff to buy, all to do with baking! Also sell dried whole eggs, which is increasingly hard for the home baker to find.
Penderys - Spice company in Fort Worth for 100+ years. Warehouse in Dallas. This is the place to go for anything chili or hot and most other culinary spices. We've been getting spices from them since 1980 and have always been happy with them. If you want chili powder that isn't hot, I recommend the Fort Worth Lite or New Mexico Lite. Both are good and don't burn me (I hate hot). They often carry blends from the top chili cook off winners, and if you want hot sauce, you will be ecstatic (the names are pretty funny too). I highly recommend!
Penzeys - Also a great spice company with store fronts in several states including the one here in Minneapolis. While they have all the normal cooking spices, they tend to focus on spices for baking, be it casseroles, pot roasts or breads. I love their Old World Blend which is their equivalent of Lawry's Seasoning Salt. No problems with orders, I highly recommend!
Sourdoughs International - First, you have to be into baking bread. Next, you can't have a mother. Mom keeps throwing out my starters. Her argument is that they stink. They also make great bread. Prior to getting these starters, I was a Herman officianodo. Herman is a sweet sourdough that is best after about 2-3 months of fermenting. Lots of recipes for it since it was introduced around 1980. (http://allrecipes.com/Recipe/Herman-Sourdough-Starter/Detail.aspx). Made lots of bread and buns with that for about 3 years before Mom tossed out my starter. Time to advance. I bought the San Francisco, Giza, and Red Sea starters. I don't like the Red Sea one; just too sour. Otherwise, these were great starters and easy to keep going until Mom threw them out. {rolling eyes} I want to try the Russian one next since it works in a bread machine.
Spice Barn - Again, lots of spices, but the extracts are the real seller here for me. No problems with orders, I highly recommend!
Sweet Celebrations (formerly Maid of Scandinavia) - another old, local company under new management. No longer having a storefront, this is mail order only for anything you need for candy making or cake decorating that Wilton doesn't have. I haven't purchased from them since the change of management. I don't do too many cakes anymore.
Taste of Home - many of the recipes I make come from the Taste of Home Magazine. Many are also available at their website, so I've included a link. The recipes always work, but may not be to your family's taste. This is not haute cuisine folks, so don't expect it, but the Midwest now makes more than casserole with cream of something soup, although still popular. You can also buy past annuals from their catalog.
Southern Living - I love Southern cooking. It's not all fried chicken, biscuits and gravy. While I've never been a subscriber, I have all the annuals from the 80s and early 90s and recipes galore. You too can get these. They are cheap on Ebay now. I'm including the link to their site, because they continue to have new recipes that reflect current Southern cuisine; some of it is fusion, some just lower fat or different prep.
Epicurious - I don't care much for gourmet food, as I lack taste buds (loss of smell, no kidding). However, I do watch the show and some of the stuff is fast, easy and cheap to make. Pineapple Foster was just featured on Food TV this week and I'm trying it this weekend! The videos and illustrations make this site worthy of a visit even if you never make a recipe from here.
Cooks Illustrated - I was a charter member when this magazine came out. Wonderful illustrations and step-by step how tos. Lots of history of how things were developed or why you do this a certain way. The recipes sucked. They had too many errors. These were not inexpensive ingredients and after throwing out a third meal uneaten, I tossed my mags when they arrived. Sometime later, they must have added an extra editor to double check the recipes because I don't hear the complaints that once existed. I love the videos and explanations on this site, but many of the recipes cannot be directly accessed without getting a subscription. A pain, but there you go.
Land O Lakes - Large regional dairy. Some very yummy recipes here.
Creamed Peas on Toast
When I learned how to cook (12 or 13 before I could use a stove), our afternoon snack after getting home from school was frequently creamed peas. It was easy to make. Tasted great. It's pretty darn good on potatoes too. There are many variations out there, but this is the basic. I tend to add a good deal more pepper. It's just your basic thick white sauce with peas. Traditionally, you are supposed to serve this on toast, but we don't actually do that too often. It is my understanding that this recipe originally came from Sweden or Germany. That would account for it being as popular in Texas (lots of Germans) as in Minnesota while it was virtually unheard of in Massachusetts.
2 tablespoons butter or margarine
2 tablespoon flour
1 cup milk
1/2 teaspoon salt
1/8 teaspoon pepper, or to taste
2 cups of cooked peas (frozen, canned or fresh cooked)
Melt margarine in saucepan on low heat. Add flour, salt and pepper and mix. Cook for about a minute, stirring occasionally. While stirring, slowly add a little milk and keep stirring to prevent lumps. Pour all the milk in, stirring well. Cook until it starts to thicken. Add the peas. Cook until peas are heated through. Serve by itself, on potatoes or over toast.
White sauce takes a little practice to get it right without the lumps. Lumpy creamed peas is just fine, but then pour over potatoes or rice to hide the lumps. Variations will have more butter or more flour, which is just fine.
The variations I think are most interesting include adding garlic, shallots or green onions, and sour cream. The problem with the garlic or onions is that you have to cook them first, which adds time to your prep. Regular cream just makes this dish too heavy. Adding a 1/2 teaspoon of mustard may be a good twist. A little cardamom would also be in keeping with the Swedish tradition, as it is one of the most common spices in that cuisine (The Finns use it soley in baked goods). Some folks add a little bit of sugar; I think it is unnecessary, but perhaps if your peas aren't so good, it helps. In any case, enjoy!
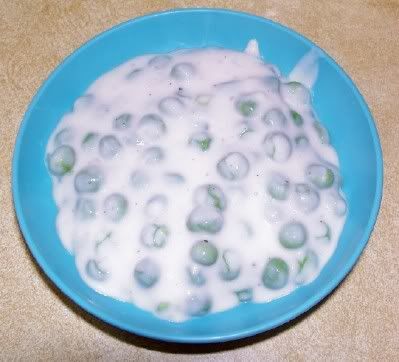
2 tablespoons butter or margarine
2 tablespoon flour
1 cup milk
1/2 teaspoon salt
1/8 teaspoon pepper, or to taste
2 cups of cooked peas (frozen, canned or fresh cooked)
Melt margarine in saucepan on low heat. Add flour, salt and pepper and mix. Cook for about a minute, stirring occasionally. While stirring, slowly add a little milk and keep stirring to prevent lumps. Pour all the milk in, stirring well. Cook until it starts to thicken. Add the peas. Cook until peas are heated through. Serve by itself, on potatoes or over toast.
White sauce takes a little practice to get it right without the lumps. Lumpy creamed peas is just fine, but then pour over potatoes or rice to hide the lumps. Variations will have more butter or more flour, which is just fine.
Saturday, May 26, 2007
Baked Ripe Plantains
What do you do if you don't have time to make your Platanos and your plantains are now yellow? You can bake them. The advantage to this recipe is that you can make ahead and reheat in the microwave. Keep covered to maintain moisture.
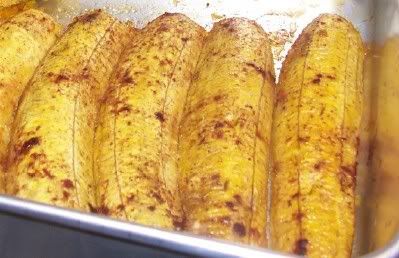
Baked Ripe Plantains
Start with very ripe plantains. Jacket will be yellow like a regular banana you slice into your Cheerios. Slice lengthwise and peel. Slice in half lengthwise. Place in buttered pan, flat side down, lining the bottom of the pan with plantains. With a brush, paint over with a little butter. Sprinkle with cinnamon and nutmeg, brown sugar and 1/2 cup orange juice. Cover pan and bake at 350 F for about 30 minutes. Remove cover and bake for another 20 minutes. Place on plate to serve by itself or add stuff like Cool Whip or ice cream.
This snack tastes rather like a baked sweet potato. If you have a much younger crowd, you may want to add more brown sugar.
Here they are in the oven baking. We used an aluminum cake pan.
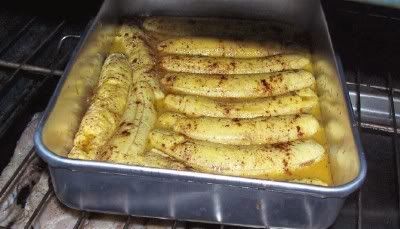
Plantain Update
My Aunt came over today and showed us how she now makes Platanos and what to do when your plantains are too ripe for the treat. As she was cooking, it dawned on me that I could give you action photos!! Note, this is the color you want your Plantains: Green!

Platanos
Several green plantains (each one makes 4-5 snacks)
Oil (vegetable, peanut oil)
3 quart saucepan (deep to prevent spills)
Serated spoon
2 tablespoons Salt
1/2 teaspoon Garlic powder
1 cup of water
Put about 4-5 inches of oil in saucepan and heat oil to a gentle boil. Place salt and garlic into a small bowl and add about a cup of water. Mix well. Slice the banana jacket lengthwise and peel off. Slice plantains about 1 1/2 inches thick. Place into oil using serrated spoon. Occasionally turning, cook until light brown (5-7 minutes). Remove cooked slices to paper towels to drain for a minute. Smoosh flat in hamburger press (or with flat bottomed bottle). Place each piece into the bowl of water, turn over, then remove and place on a paper toweled plate to rest for about 3 minutes. Turn the heat up on the skillet so that the oil is boiling harder. Place the pieces into the oil and fry until slighty darker brown and crisp, about 2-3 minutes. Remove and place on towels to drain. Eat while hot.
Here's the first fry. The goal here is to soften the fruit, so keep the heat down! I have to take this opportunity to point out the 1930s cookware in use. Originally we got a couple of these saucepans from my grandmother when she passed away, but occasionally, they show up at Salvation Army or Ebay. I have a whole set. Also, the spoon rest was on my grandmother's stove and in continual use since the 1950s.
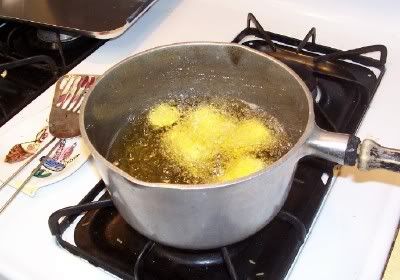
Here's what they look like after flattening and dipping in salt water.

Here's what we used to flatten our snacks. An ordinary hamburger press. You can still find these some places, but I mostly see them at garage sales. This particular one is at least 30 years old. Use a large sheet of waxed paper to protect the wood and reduce your cleaning.
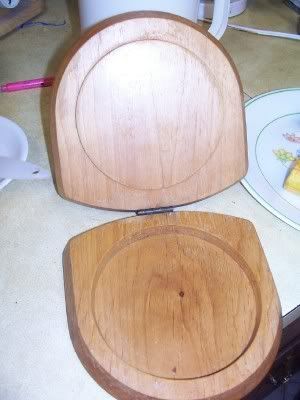
Here's a comparison of first fry vs. completed. These are cut about 2 inches thick for the cup press.
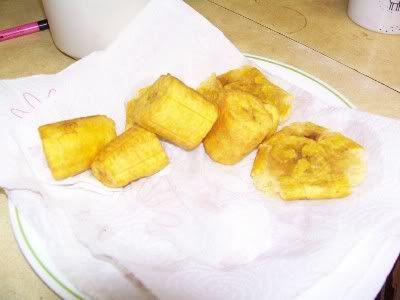
These ones use a 'cup' press for canapes. Fill with whatever you like.
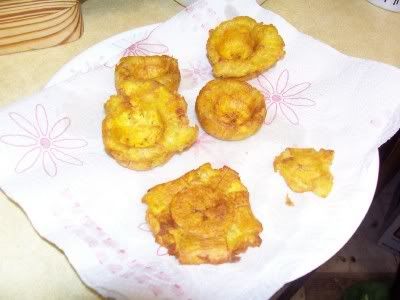
Platanos
Several green plantains (each one makes 4-5 snacks)
Oil (vegetable, peanut oil)
3 quart saucepan (deep to prevent spills)
Serated spoon
2 tablespoons Salt
1/2 teaspoon Garlic powder
1 cup of water
Put about 4-5 inches of oil in saucepan and heat oil to a gentle boil. Place salt and garlic into a small bowl and add about a cup of water. Mix well. Slice the banana jacket lengthwise and peel off. Slice plantains about 1 1/2 inches thick. Place into oil using serrated spoon. Occasionally turning, cook until light brown (5-7 minutes). Remove cooked slices to paper towels to drain for a minute. Smoosh flat in hamburger press (or with flat bottomed bottle). Place each piece into the bowl of water, turn over, then remove and place on a paper toweled plate to rest for about 3 minutes. Turn the heat up on the skillet so that the oil is boiling harder. Place the pieces into the oil and fry until slighty darker brown and crisp, about 2-3 minutes. Remove and place on towels to drain. Eat while hot.
Here's the first fry. The goal here is to soften the fruit, so keep the heat down! I have to take this opportunity to point out the 1930s cookware in use. Originally we got a couple of these saucepans from my grandmother when she passed away, but occasionally, they show up at Salvation Army or Ebay. I have a whole set. Also, the spoon rest was on my grandmother's stove and in continual use since the 1950s.
Here's what they look like after flattening and dipping in salt water.
Here's what we used to flatten our snacks. An ordinary hamburger press. You can still find these some places, but I mostly see them at garage sales. This particular one is at least 30 years old. Use a large sheet of waxed paper to protect the wood and reduce your cleaning.
Here's a comparison of first fry vs. completed. These are cut about 2 inches thick for the cup press.
These ones use a 'cup' press for canapes. Fill with whatever you like.
Friday, May 25, 2007
Homemade Yogurt
On one of my discussion boards, someone was talking about going on the Fruit and Yogurt Diet. Then, there are 12 posts saying how unhealthy it is. It isn't. It is commonly what is used, with some additions, for someone with their jaw wired shut. One thing you do need though is yogurt. Lots of it. It is SO easy to make yourself that the only problem is having the room in the fridge to keep it cool once it is done. I prefer vanilla yogurt (plain, no fruit). But I also adore smoothies with a variety of fruits and flavors!
Making Homemade Yogurt by the Gallon
Equipment:
Thermometer
8 quart stainless steel stock pot (thin wall is better)
Heating pad
1 gallon whole milk
Either yogurt starter or small container of any yogurt at grocery store.
Cutting Board
Pour the gallon of milk into the stock pot. Heat gently, stirring occasionally, until temperature reaches 120 F. Turn it off. Let it cool until temperature is between 108 to 112 F. Add the container of yogurt (you can take a little out for a snack). Stir well. Place a cutting board on counter. This will protect your counter from heat damage. Place heating pad on top. Place stock pot on top of that. Turn on low and cover. Monitor. Is it maintaining the temperature between 108 and 112? If not, turn to medium. Cover and leave overnight. It needs a good 12-18 hours of incubating. Once done, you have yogurt. Not the firm stuff you have at the store (they use stabilizers), but absolutely perfect for smoothies! Sweeten to taste using whatever you want. If you would like something firmer, put several layers of cheesecloth into a colander set into a bowl. Add as much yogurt as will fit. Let it sit for a few hours to drain. It does not have to be refrigerated during this process.
You can save out 1 cup amounts of yogurt and freeze it flat in a 1 quart Ziploc to make later batches. Unthaw the yogurt prior to heating your milk.
The reason why you heat the milk and then cool it is to kill off any bacteria that may compete with the yogurt culture. You don't need a double boiler. Just keep the heat low. Occasionally, you'll get a little milk burn in the center, but it doesn't affect flavor. If you just can't get your heat down far enough (my sister who has propane can't), then place a trivet on the bottom of a wider pan, add several inches of water and you have a double boiler. The advantage of using a thin walled stock pot is that the heat from the heating pad gets right through. I have not tried it with a Caphalon stock pot--the thickness may require the medium heat on your heating pad. You can use 2% or skim, but frankly, I didn't like the flavor or texture as much.
Oh, and if you are interested in doing a Fruit and Yogurt diet, make sure you use WHOLE MILK to have enough fat to prevent a blood sugar spike and add raw or pasteurized egg to your smoothie to increase the protein. I would also add a veggie salad: crisp veggies with salt and pepper, no dressing.
Now, Alton Brown (Good Eats) uses a slightly higher incubation temperature. Not sure what the advantage is, but I'm giving you the link because his Thousand Island Dressing using yogurt is pretty good too. He uses 2%.
http://www.foodnetwork.com/food/recipes/recipe/0,1977,FOOD_9936_19495,00.html
If you want to know about the history of yogurt and some of it's uses, here's a great link.
http://en.wikipedia.org/wiki/Yogurt
Monday, May 21, 2007
Cutty Sark and SOS
Today's recipe is in honor of the Cutty Sark, which suffered a serious fire overnight. My late grandfather served on a Merchant Marine vessel (torpedoed by the Nazis) and he said the food was the same as in the US Navy. This is a love it or hate it recipe given to me by a retired naval cook. My Dad still loves this stuff and he's been out of the navy since the 50s. It also is very useful on camping trips. Usually referred to as SOS when around women or children, nonetheless, pretty much any guy who has been in the military knows about it and either loves it or detests it. Easy, easy to make, although nowadays, I use Carl Buddig deli beef or corned beef instead of dried beef (lower in salt, easier to chew, cheaper). If you do that, you can alter the first step as you don't have to hydrate the beef. I've noted here on the Internet that some folks have substituted cooked hamburger for the chipped beef. It's probably just fine, but it's not SOS. Final note: dried beef is typically found in the vicinity of Spam which is another love it or hate it food popular in the armed forces. I happen to love it.
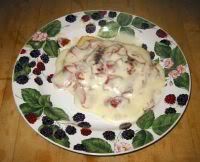
Photo from Wikipedia
Shit On A Shingle (or Chipped Beef on Toast)
4.5 oz. dried beef
2 cups milk
2 tbs. butter
¼ cup flour
Salt and pepper
6 slices bread
Melt butter in pan, add dried beef. Cook 2-3 minutes to brown. Add milk (reserve ¼ cup for later), salt & pepper. Bring to boil. Mix flour and remaining milk together. Slowly add to boiling mixture until it begins to thicken. Serve over toast.
Now, the above is the home version. The one at Wikipedia is much closer to what this retired navy cook actually made.
http://en.wikibooks.org/wiki/Cookbook:Chipped_beef_on_toast
Sunday, May 20, 2007
Hawaiian Baked Chicken
As you are probably aware, the only thing Hawaiian about most Hawaiian recipes is the pineapple. This one is no different, but it was tasty. I love pineapple with chicken, so am willing to try anything that has it.
This recipe comes from my recently purchased Taste of Home Cookbook. It's a 3 ring bound cookbook designed to be a general cookbook for any home. I love my original Betty Crocker Picture Cookbook, but badly need updated recipes and cooking information. If you need a starter cookbook for the non-gourmet, this is a good one to get. If your giftee is into gourmet food, then I would recommend the latest copy of Joy of Cooking.
I liked this simple recipe, but contrary to what I normally do, I changed it first time out. I added a lot more paprika than the recipe called for and I'm glad I did. Note the temperature. I had everything ready to pop into the oven when I realized the 400 degree temp. Since I wasn't sure whether my baking dish could be in heat that high, I baked at 350 for a longer time. I had a lot of liquid, but that could have been due to the lower temp. I also substituted with canned chunk pineapple, which was all I had. Tidbits would have been a better substitute for crushed. I forgot the butter, but it still tasted fine (loses body). Since I don't like wine in my food, I used the chicken broth. This recipe would also work fine in the microwave or roaster, so if it's too hot, you have alternatives.
Hawaiian Baked Chicken
Leona Callen, Anna Maria, FL
12 boneless skinless chicken thighs (4 oz. ea)
2 cans (8 oz ea) unsweetened crushed pineapple, undrained
1/4 cup sherry or chicken broth
1/4 cup spicy brown mustard
1/4 cup honey
2 tablespoons butter, melted
1/2 teaspoon paprika
1. Arrange chicken in a shallow baking dish coated with nonstick cooking spray. In a small bowl, combine the pineapple, sherry or broth, mustard, honey and butter; mix well.
2. Spoon over chicken; sprinkle with paprika. Bake uncovered, at 400 F for 35-45 minutes or until a meat thermometer reads 180 F.
Wednesday, May 16, 2007
Coconut Bread
We went from 80 F yesterday to expecting frost tonight. Totally weird, but baking season resurfaces here during these opportunities. Tried this bread. Tasty, tasty. By the way, did you know that Quick Breads are an American invention? Yeah, imagine that?!
Coconut Bread
from Taste of Home Book of Baking (Virginia Doyle, Pinedale, WY).
2 cups sugar
3/4 cup vegetable oil
4 eggs
2 teaspoons coconut extract
3 cups all-purpose flour
1 teaspoon baking powder
1/2 teaspoon baking soda
1/2 teaspoon salt
1 cup buttermilk
1 cup flaked coconut
1 cup chopped walnuts
In a large mixing bowl, combine the sugar, oil, eggs and extract. Combine the flour, baking powder, baking soda and salt; add to sugar mixture alternately with buttermilk, stirring just until moistened. Fold in coconut and walnuts.
Pour into two greased 8x4x2 inch loaf pans. Bake at 325 F for 60-65 minutes or until a toothpick inserted near the center comes out clean. Cool for 10 minutes before removing from pans to wire racks to cool completely. Yield : 2 loaves.
Mixed Bean Casserole
I've tried several versions of this casserole and they all are good. This one is pretty easy to get made up and ready and works perfect for a family picnic or barbecue. It is also not too sweet and non-cook friendly as well. If you can saute an onion without burning it, you are good to go. The only thing I do differently is I add the bacon to the casserole.
Mixed Bean Casserole
from Lone Star Legacy
1 clove garlic, minced
1 medium onion, chopped
3 tablespoons bacon drippings
1 can (15 oz.) baked beans
1 can (15 oz) kidney beans
1 can (15 oz) lima beans
1/2 cup catsup
3 tablespoons vinegar
1 tablespoon brown sugar
1 teaspoon dry mustard
1 teaspoon salt
1/4 teaspoon pepper
Cook garlic and onions in bacon drippings until onion is limp. Place all ingredients into a 2 quart casserole and mix. Bake at 350 F for 45 minutes. Serves 6. If it's hot out, this works fine in a slow cooker as well.
Sunday, May 13, 2007
Mandarin Pork
This was amazingly yummy. Mom used a 3 lb. pork roast and baked this at 325 F instead of grilling and it was wonderful!!! Just bake until meat thermometer says it's done (hour and a half, two hours depending on size). From the cookbook Country Pork (Taste of Home books). Served with fried rice and a salad, this was awfully yummy.
Mandarin Pork
(Flo Weiss, Seaside, OR)
1 cup soy sauce
1/2 cup vegetable oil
3 tablespoons honey
1 tablespoon ground ginger
1 tablespoon ground mustard
1 garlic clove, minced
2 pork tenderloins (3/4 to 1 pound each)
Sweet and Sour Sauce
1/2 cup orange marmalade
2 tablespoons vinegar
1 tablespoon diced pimentos
1/8 teaspoon paprika
dash salt
Fire Hot Mustard
1/4 cup boiling water
1/4 cup ground mustard
1/2 teaspoon salt
Combine the first six ingredients in a large resealable plastic bag or shallow glass container; add pork and turn to coat. Seal bag or cover container; refrigerate overnight, turning meat several times. Meanwhile, combine sauce ingredients in a bowl; cover and chill. In another bowl, stir boiling water into mustard; add salt and stir until smooth. Cover and let stand at room temperature for 1 hour; chill. Drain meat and discard marinade. Grill, covered, over medium coals, turning occasionally, for 18-20 minutes or until a meat thermometer reads 160 - 170 F. Let stand for 5 minutes before slicing. Serve with sauce and mustard for dipping. Yield 6-8 servings.
Saturday, May 12, 2007
Plantanos
Probably the last time any of you have thought of Panama is back when David Lee Roth was still with Van Halen. Today, I have a quick and easy recipe for you. My Aunt comes from Panama and taught me years ago how to make very yummy Plantanos. Plantains are a large banana that must be cooked; they've been appearing in mainstream grocery stores for around 10 years. It's very starchy and just is nothing like a regular dessert banana. These may be a tad fattening, but they are totally addictive. Wear an apron--you don't want to accidentally get oil on your clothing.
Plantanos
Several plantains
oil - enough for a level of about 3 inch inches.
salt
Heat oil in a wide frypan, electric frypan or in your electric frycooker. Peel plantains and slice about 1 1/2 inches thick. Fry in hot oil until light browned, then flip and fry the other side. Lift out with tongs or drainer spoon. Use a flat-bottomed glass or the flat side of a meat tenderizer and squish it flat. Then place back in the oil, and fry each side until browned. Place on paper towels and sprinkle with salt. Let cool enough so you don't burn your mouth!! (BTDT). These do not reheat well, so enjoy while hot or warm!
Foreign coffee isn't something one usually gets to see to often. Here's your chance. My Aunt brought this back after a recent trip to visit her Mom and other relatives. After a taste test, I'd say this one is fairly similar to what we regularly drink (MJB European Roast). It's ground a little finer, so didn't work so well in my reusable filter.
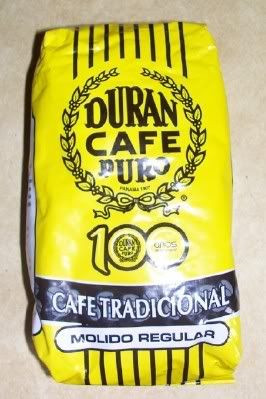
Friday, May 11, 2007
It's Rhubarb Time!
Today, we'll visit with one of my most cherished family desserts: Rhubarb Crunch Pie. We use rhubarb brought over from Finland by my great-Grandfather Heikke (Henry) Hannunp Kupunen in 1903. It's very easy to propogate. My sister and cousin are now keepers of the rhubarb, although we have a few plants here at the homestead. You can use frozen, which really isn't a choice if you live in the South or either coast where it just doesn't get cold enough to grow. Normally, we can only pull rhubarb twice a year over a couple of weeks, but this year, it came up early (made some this a.m.), so I expect to get an extra crop before the end of June. Serve with a dollop of cream or Cool Whip. Good warm or room temperature. The recipe comes from a 1965 church cookbook that is so old and worn that the covers are gone.
Rhubarb Crunch Pie
1 cup sifted flour
1 cup brown sugar
1 tsp. cinnamon
2 cups oatmeal
1/2 cup melted shortening (I currently use margarine or butter)
Mix until crumbly, spread 1/2 on bottom of greased 13 x 9 inch pan.
Filling:
1 cup sugar
1 teaspoon vanilla
1 cup water
2 tablespoons cornstarch
6 cups cut up rhubarb
Mix sugar, vanilla, water and cornstarch and cook on low-medium until clear; Add rhubarb and mix well. Pour over pie shell and cover with remaining crumbs. Bake 350 degrees about 1 hour.
Notes: if you want just a 9 inch deep dish pie, use only 3/4 cup oatmeal, 1/4 cup shortening and 4 cups rhubarb. Bake 1 hour. Rhubarb cooks down, so if your pie plate looks way overfilled, that's not a problem! Also, Mom recently has started just laying out the rhubarb and just pouring the filling over it evenly. That seems to work well for her and is actually easier, but I still mix it separately.
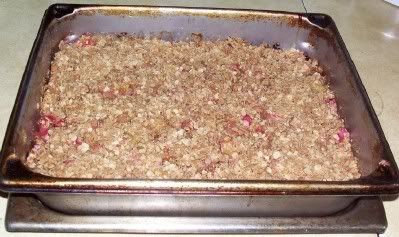
Rhubarb Crunch Pie. That burnt on film along the top edges is what happens when you use PAM instead of shortening to grease. I could never understand why all the glass dishes had so much of that brown stuff. Not only is it ugly for presentation, but it's tough to get off. Pam is a mist and doesn't go just where you want it to go. It goes everywhere. Keep that in mind!
Also in the works today was getting several cookbooks in the mail. I'm a big fan of Taste of Home magazine and recently they had a sale to try and make room in their warehouse. So, got a bunch of cookbooks cheap! These are my latest 3.


Rhubarb Crunch Pie
1 cup sifted flour
1 cup brown sugar
1 tsp. cinnamon
2 cups oatmeal
1/2 cup melted shortening (I currently use margarine or butter)
Mix until crumbly, spread 1/2 on bottom of greased 13 x 9 inch pan.
Filling:
1 cup sugar
1 teaspoon vanilla
1 cup water
2 tablespoons cornstarch
6 cups cut up rhubarb
Mix sugar, vanilla, water and cornstarch and cook on low-medium until clear; Add rhubarb and mix well. Pour over pie shell and cover with remaining crumbs. Bake 350 degrees about 1 hour.
Notes: if you want just a 9 inch deep dish pie, use only 3/4 cup oatmeal, 1/4 cup shortening and 4 cups rhubarb. Bake 1 hour. Rhubarb cooks down, so if your pie plate looks way overfilled, that's not a problem! Also, Mom recently has started just laying out the rhubarb and just pouring the filling over it evenly. That seems to work well for her and is actually easier, but I still mix it separately.
Rhubarb Crunch Pie. That burnt on film along the top edges is what happens when you use PAM instead of shortening to grease. I could never understand why all the glass dishes had so much of that brown stuff. Not only is it ugly for presentation, but it's tough to get off. Pam is a mist and doesn't go just where you want it to go. It goes everywhere. Keep that in mind!
Also in the works today was getting several cookbooks in the mail. I'm a big fan of Taste of Home magazine and recently they had a sale to try and make room in their warehouse. So, got a bunch of cookbooks cheap! These are my latest 3.
Sunday, May 6, 2007
Dump Cake
What can I say about this? Easy, tasty, simple. This particular recipe came from the 1995 St. Philips Lutheran Church Cookbook, Fridley MN.
Dump Cake
1 can cherry pie mix
1 large can crushed pineapple, undrained
1 large box yellow or white cake mix
2 sticks butter or margarine, cut into slices
1/2 cup chopped nuts
1/2 cup coconut
Dump into 9 x 13 inch pan in order listed. Top with chopped nuts and coconut. Bake in 350 F oven for 35 to 40 minutes. Serve warm or cold with whipped cream.
Thursday, May 3, 2007
Sausage Pasta Stew
We are in the midst of a cookbook upheaval. I'm trying to cut in half my collection of more than 400 cookbooks and booklets, while we continue to get some new ones. Mom's latest is Taste of Home's Contest Winning Recipes 2007. This was a slow cooker recipe that seemed weird, but turned out tasty! It makes a LOT (filled the crock pot). Use any sausage that you want. I used Jimmy Deans Bulk Original Recipe sausage, but otherwise I would consider something like the Hot Italian sausage sold in bulk at your grocery store. Oh, and the red bell pepper really works in this stuff better than the green. My changes. I had no summer squash so added some leftover tomatoes from a salad. I also used canned peas. If you need this meal in a shorter time and even without a slow cooker, parboil the carrots, then put everything together as instructed. I just used wavy pasta rather than spiral. It's what I had in the cupboard.
Sausage Pasta Stew
(Sarah Bowen, Upland, CA)
1 pound turkey Italian sausage links, casings removed
4 cups water
1 jar (26 oz). meatless spaghetti sauce
1 can (16 oz.) kidney beans, rinsed and drained
1 medium yellow summer squash, halved lengthwise and cut into 1 inch pieces
2 medium carrots, cut into 1/4 inch slices
1 medium sweet red or green pepper, diced
1/3 cup chopped onion
1 1/2 cups uncooked spiral pasta
1 cup frozen peas
1 teaspoon sugar
1/2 teaspoon salt
1/4 teaspoon pepper
1. In a nonstick skillet, cook sausage links over medium heat until no longer pink; drain and place in a 5 qt. slow cooker. Add water, spaghetti sauce, kidney beans, summer squash, carrots, red pepper and onion. Mix well. Cover and cook on low for 7-9 hours or until vegetables are tender.
2. Stir in the pasta, peas, sugar, salt and pepper; mix well. Cover and cook on high for 15-20 minutes or until pasta is tender. Yield 8 servings.
1 1/3 cup = 276 calories, 38 g carb, 6 g fiber, 18g protein.
Friday, April 27, 2007
Using Up Pears
We bought a bunch of pears that, by the time they felt ripe, the insides were starting to brown. So, what do you do? Make Pear Sauce! Easy, easy, easy. Just like applesauce, only pears.
Pear Sauce
Peel 3-4 pears, and cut out middle section. Cut into chunks. Place into a small, covered microwavable casserole dish. Add about 1/8 cup water. Put in microwave for 8 minutes at 50% power. Remove and squash with potato masher or fork. Add cinnamon to taste. Taste. Does it need sweetener? If so, add a little, mix and serve.
This can also be frozen into cubes and served later with pork chops or for children's meals.
Saturday, April 21, 2007
Baked Mac N Cheese (Microwave too!)
I've been looking for a creamier Mac and Cheese recipe that also works in the microwave. Why? It is TOO HOT in the summer to run the oven sometimes. Kraft's Mac and Cheese isn't as cheesy as it once was. So, I tried this easy-to-make one. I do think this recipe needs more salt, so test it and taste it and adjust accordingly. So far, this is the best recipe out of the microwave.
Baked Mac n Cheese
from Campbell's Cookbook
1 1/2 cups dry elbow macaroni
2 cans (10.75 oz each) Campbell's Condensed Cheddar cheese
1 tablespoon prepared mustard
1/8 teaspoon pepper
1 cup milk
1 tablespoon margarine or butter, melted
2 tablespoons dry bread crumbs (not needed if microwaved)
1 tsp. chopped fresh parsley, for garnish
1. In 3 quart saucepan, cook macaroni according to package directions. Drain.
2. In 2 quart casserole, combine soup, mustard and pepper. Gradually stir in milk until smooth. Add macaroni; toss to coat well.
3. In small bowl, combine margarine, bread crumbs and chopped parsley. Sprinkle over macaroni mixture.
4. Bake at 375 F for 40 minutes or until hot and bubbling. Garnish with tomato and parsley if desired.
Makes about 6 cups or 8 side-dish servings. 20 minutes prep, 40 minutes bake.
If microwaving, Cook macaroni as directed in step 1. In 2 quart microwave-safe casserole, combine soup, mustard and pepper. Gradually stir in milk until smooth. Add macaroni; toss to coat well. Cover with lid; microwave on high 10 minutes or until hot and bubbling, stirring twice during cooking. In a small bowl, combine margarine, bread crumbs and chopped parsley. Sprinkle over macaroni mixture. Microwave uncovered, 1 minute more. Garnish.
Wednesday, February 21, 2007
Lemon Blueberry Muffins
Mom made some very yummy muffins today. I often don't like things made with Bisquick because I get a strong aftertaste from it (I am unable to smell, so certain flavors are accentuated). This recipe is absolutely perfect! I do so like recipes out of Taste of Home.
Lemon Blueberry Muffins
Quick Cooking: March/April 2005
2 cups biscuit/baking mix
1/2 cup plus 2 tablespoons sugar, divided
1 egg
1 cup (8 oz) sour cream
1 cup fresh or frozen blueberries
2 teaspoons grated lemon peel
In a large bowl, combine the biscuit mix and 1/2 cup sugar. Whisk the egg and sour cream; stir into dry ingredients just until moistened. Fold in blueberries.
Fill greased or paper-lined muffin cups half full. Combine lemon peel and remaining sugar; sprinkle over batter. Bake at 400 F for 20-25 minutes or until a toothpick comes out clean. Cool for 5 minutes before removing from pan to a wire rack. Serve warm. Yield 1 dozen.
Note: if using frozen blueberries, do not thaw before adding to batter.
Tuesday, February 6, 2007
Sticky Chicken
Once upon a time, I came across a most wondrous recipe for cream cheese brownies. They were to-die-for. A co-worker tried them and asked for the recipe and I dutifully wrote it down. A couple of weeks later, I was harranged for giving her a different recipe. Turns out that (a) she substituted ingredients and (b) didn't bake it at the temperature required and (c) baked it longer than the recipe said. Folks, unless you suspect a typo, if you don't follow the directions, you aren't going to get the same result. My Mom doesn't seem to get why I want to always follow the original recipe the first time. How can you determine if it's the recipe or your substitution that resulted in less than wonderful food?
The recipe for Sticky Chicken often suffers this problem. The most common mistake is oven temperature. You may have it set at 250 F, but is that what the oven is really baking at? How can you know without an oven thermometer? Recipes and meats have much less fat in them than years ago, so exacting oven temperature becomes much more important. This is a very yummy chicken recipe that is prepared a day in advance. The slow cooking time results in a different texture and flavor than if you bake it at the traditional 350 F. If you are in a hurry, certainly feel free to bake at 350 F for lots less time; just realize that you are not getting the same recipe result. It's still yummy.
Another good thing about this recipe is that you can prepare a couple of chickens and freeze one. Take out the night before to thaw in the fridge, and then place right in the oven. Note the size of the chicken - 3 lbs. Adjust cooking times if you use something bigger or smaller and don't use a 5 or 6 pounder at all.
Sticky Chicken (the original by Mimi Hiller)
2 teaspoons salt
1 teaspoon paprika
3/4 teaspoon cayenne pepper (cut in half if you aren't used to cayenne pepper)
1/2 teaspoon onion powder
1/2 teaspoon thyme
1/2 teaspoon white pepper
1/4 teaspoon garlic powder
1/4 teaspoon black pepper
1 whole roasting chicken, about 3 pounds
1 cup chopped onions
Combine all spices (first 8 ingredients) in small bowl.
Rinse chicken, inside and out. Drain well.
Rub spice mixture over skin and the inside of chicken.
Place in a resealable plastic bag, seal and refrigerate overnight.
When ready to roast, stuff cavity with onions.
Place chicken breast side down in roasting pan.
Roast uncovered at 250ºF (that's not a typo...it's really 250º! Anything over 225º is safe as long as the chicken reaches an internal temperature of at least 155º, which this does, and more) for about 5 hours. Baste occasionally with pan juices or until pan juices start to caramelize on bottom of pan and chicken is golden brown.
Serves 4.
I've copied and pasted this recipe directly from Mimi's site. To view more of her recipes, here's a link to her site. http://www.cyber-kitchen.com/recipes/Foolproof_Sticky_Chicken.htm
Subscribe to:
Posts (Atom)